Discover the simple and effective steps to properly seal your windows, ensuring improved energy efficiency and protection from drafts in this comprehensive guide.
Windows are an essential part of any home. They let in natural light, provide ventilation, and offer a beautiful view of the outdoors.
However, if your windows are not properly sealed, they can also be a source of energy loss and air leakage. This can lead to higher energy bills and an uncomfortable living environment.
In this blog post, we will discuss how to seal a window effectively. Whether you’re looking to save money on your energy bills or simply want to improve the comfort of your home, these tips will help you achieve both goals.
So let’s dive in and learn how to seal those windows like a pro!
Key takeaways:
- Identify Window Type
- Inspect Window Frame
- Locate the Leaks
- Do the Easy Fixes First
- Choose Sealant Material
Identify Window Type
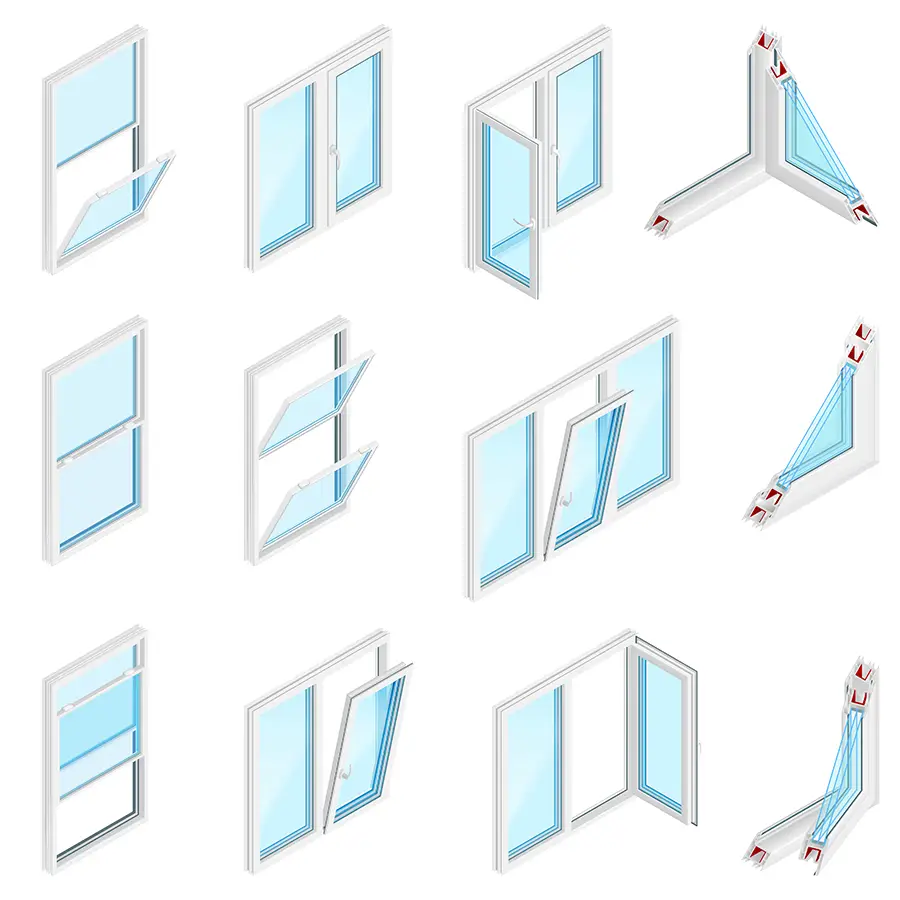
The first step in sealing your windows is to identify the type of window you have. Different types of windows require different methods for sealing, so it’s important to know what you’re dealing with before getting started.
There are several common types of windows, including single-hung, double-hung, casement, sliding and picture. Single-hung and double-hung windows are the most common in homes today.
They both have two sashes that slide up and down within a frame but only one sash moves on a single hung while both move on a double hung.
Casement windows open outward like doors using hinges attached at the side while sliding ones glide horizontally along tracks mounted at either end or bottom/top depending on design. Picture Windows do not open as they are designed solely for viewing purposes.
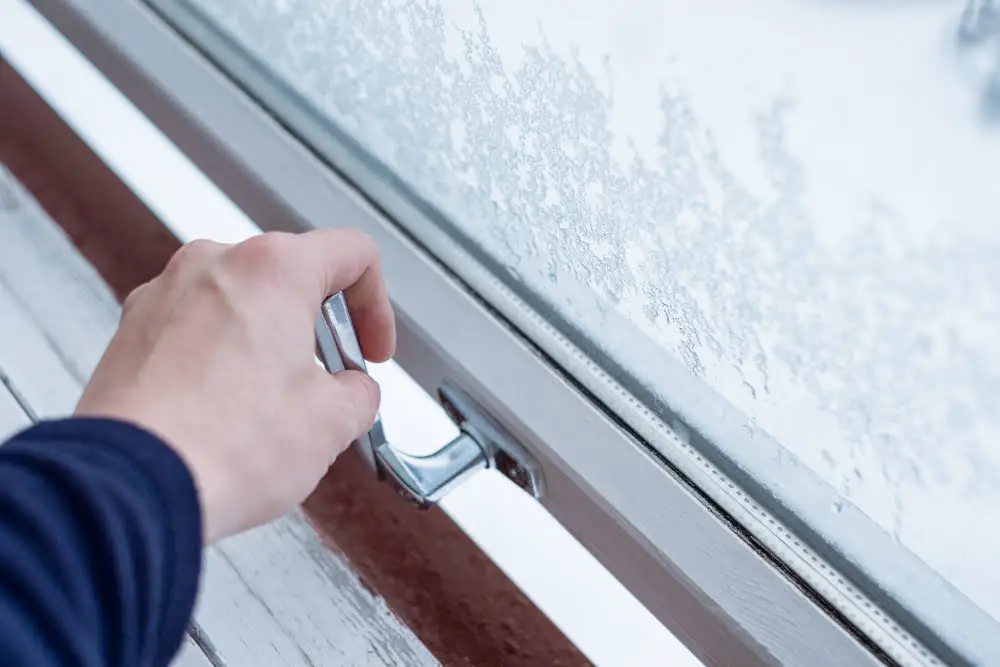
Inspect Window Frame

Check for any cracks, gaps, or damage that may be causing air leaks. Start by examining the exterior of the window frame and look for signs of wear and tear such as peeling paint or rotting wood.
Next, move inside and check around the perimeter of each window pane. Look closely at where the glass meets with its surrounding material; this area is a common source of drafts.
If you notice any issues during your inspection, make note of them so you can address them later on in our guide. By taking time to carefully inspect your windows before beginning repairs will help ensure that all problem areas are identified upfront so they can be fixed properly without having to redo work later on down-the-line.
Locate the Leaks

This can be done by conducting a thorough inspection of your windows and identifying any areas where air may be escaping or entering your home. One way to do this is by using an incense stick or candle and holding it near the edges of your windows on a windy day.
If you notice that the smoke from the incense stick or candle moves, then you have located an area where air is leaking through.
Another method for locating leaks involves using a flashlight during nighttime hours while someone else shines light around outside of each window frame from outdoors, looking for any visible gaps between frames and walls.
Do the Easy Fixes First
These simple solutions can often make a significant difference in reducing drafts and improving energy efficiency.
Start by checking for any gaps or cracks around your window frame. If you notice any small gaps, use weatherstripping to seal them up.
This is an inexpensive and straightforward solution that can be done quickly.
Another easy fix is adding draft stoppers under your windowsill or along the bottom of your window frame. These are typically made from foam or rubber and help prevent cold air from entering through these areas.
By doing these quick fixes first, you may find that they solve most of your issues without having to resort to more complicated sealing methods like caulking or spray foam insulation.
Choose Sealant Material

There are several types of sealants available on the market, each with its own unique properties and benefits. Some common options include silicone caulk, acrylic latex caulk, butyl rubber sealant tape or spray foam insulation.
Silicone caulk is a popular choice for sealing windows because it is durable and flexible. It can withstand extreme temperatures without cracking or shrinking over time.
Acrylic latex caulks are easy to apply and clean up with water while still providing good adhesion to most surfaces.
Butyl rubber sealant tape is an excellent option for sealing large gaps around windows as it provides a strong bond that remains flexible even in cold weather conditions.
Spray foam insulation can be used for larger gaps where other materials may not work effectively. It expands when applied which helps fill any voids between the window frame and wall cavity creating an air-tight barrier against drafts.
Gather Necessary Tools

This will ensure that you have everything on hand and won’t need to stop midway through the process. Here are some of the essential tools you’ll need:
1. Caulking gun: A caulking gun is used to apply sealant around your window frames.
2. Putty knife: You’ll use a putty knife for removing old caulk or sealant from around your windows.
3. Weatherstripping: Weatherstripping comes in various forms such as adhesive-backed foam tape, V-strip, and door sweeps which help fill gaps between moving parts of a window frame.
4. Spray foam insulation: Use spray foam insulation for filling large gaps between framing members or where framing meets masonry surfaces like brick walls.
5. Window Insulation Film Kit – These kits come with plastic film sheets that can be applied over windows using double-sided tape and then shrunk tight with heat from a hairdryer.
6. Cleaners- Glass cleaner solution (or vinegar), rags/paper towels.
Clean Window Surfaces

Dirt and debris can prevent sealants from adhering correctly, leading to leaks and drafts. Cleaning the window surfaces is a simple process that requires only a few tools: soap or detergent, water, and a sponge or cloth.
Start by removing any loose dirt or debris with a dry cloth. Then mix some mild soap or detergent with warm water in a bucket.
Dip your sponge into the solution and wring out excess water before wiping down all areas of the window frame.
Pay close attention to corners where dirt tends to accumulate; use an old toothbrush if necessary for hard-to-reach spots like crevices around locks and handles.
Once you’ve cleaned all visible parts of your windows’ interior frames (including sashes), rinse them off using clean water from another bucket until no soapy residue remains on their surface.
Remove Old Sealant

Old and cracked sealant can prevent new sealant from adhering properly, so it’s important to remove all of it before applying a new layer. To do this, use a putty knife or scraper tool to gently scrape away the old caulk or weatherstripping around the window frame.
Be careful not to damage the window frame while removing old caulking material. If there are stubborn areas where caulking is difficult to remove with just scraping tools alone, try using a heat gun or hairdryer on low heat setting for several minutes until softened enough for easy removal.
Remove Window Trim

This step is necessary to access any gaps or cracks that may be hidden behind it. To do this, use a pry bar or putty knife to gently loosen the trim from around the window frame.
Be careful not to damage either the trim or frame during this process.
Once you’ve loosened one section of trim, work your way around until all pieces are free from their fasteners. Set them aside in a safe place for reinstallation later on.
Removing window trims can be tricky if they’re painted over several times before; therefore, take extra care when removing them so as not to cause any damage that could lead up further expenses in repairs.
Remove Old Caulk

Old caulking can be brittle or cracked, which means that it won’t provide an effective seal. To remove old caulk, use a utility knife or a putty knife to cut along the edges of the caulk line.
Then gently pull away any loose pieces with your fingers.
If there are stubborn areas where you cannot easily remove all of the old caulking material, consider using a chemical solvent designed for this purpose. Apply according to manufacturer instructions and allow sufficient time for softening before attempting removal again.
Apply Spray Foam to Large Gaps
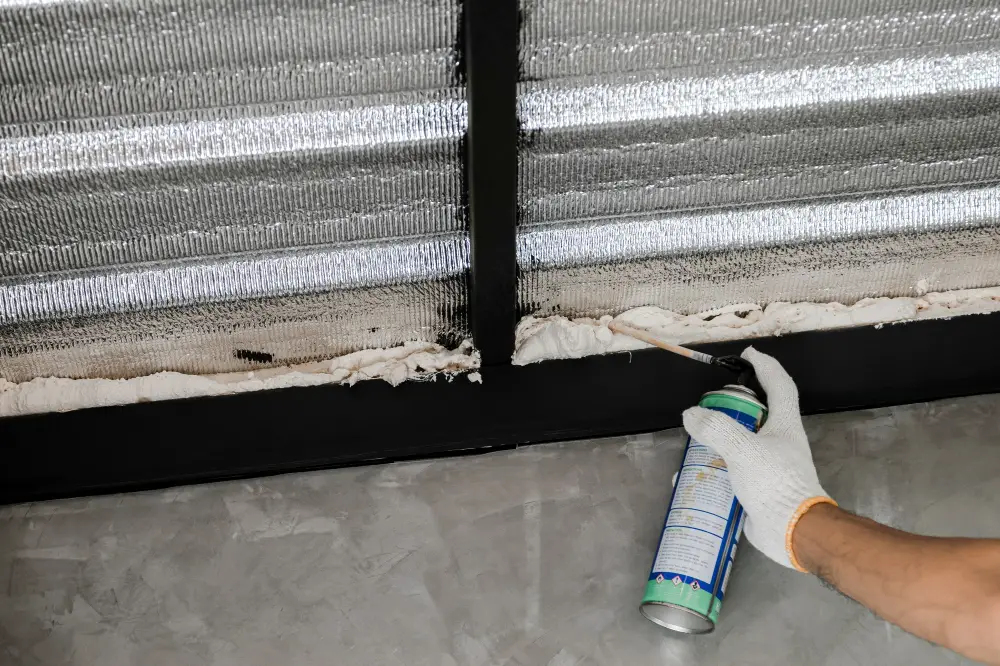
This type of insulation expands to fill the gap and creates a tight seal that prevents air from leaking in or out. Before applying spray foam, make sure to clean the area thoroughly and remove any debris or old caulking.
To apply spray foam, shake the can well and attach a nozzle if necessary. Hold the can upside down while spraying to ensure even coverage.
Start at one end of the gap and work your way across, filling in any voids as you go.
Be careful not to overfill with too much foam as it will expand significantly once applied; this could cause damage or warping on window frames if left unchecked for long periods.
Once finished applying spray foam insulation let it dry completely before trimming off excess material with a utility knife or scissors. Spray foaming is an excellent option for larger gaps but should only be used when other methods are insufficient since removing it later may require professional help due to its adhesive properties.
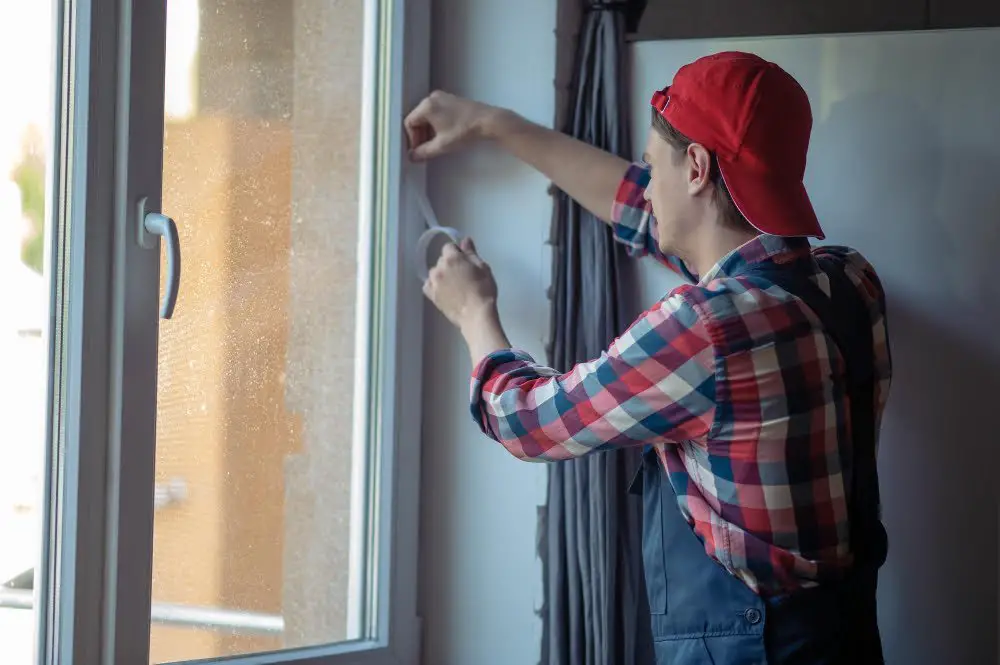
Apply Weatherstripping

Weatherstripping is a material that seals gaps around doors and windows, preventing air from escaping or entering your home. There are different types of weatherstripping materials available on the market such as foam tape, V-strip, felt strips and more.
To apply weatherstripping to your window frame:.
- Measure the length of each gap that needs sealing.
- Cut a piece of weatherstrip material according to measurements.
- Peel off adhesive backing from one side of the strip.
- Press firmly onto surface along gap area making sure there are no wrinkles or bubbles in between.
Repeat this process for all gaps until they’re completely sealed with no visible openings left behind.
Caulk Window Gaps

It’s a simple process that involves applying a bead of caulk along the gap between the window frame and wall. Before you start, make sure you have all your tools ready, including a caulking gun and high-quality silicone or latex caulk.
To begin, clean any dirt or debris from the gap using a putty knife or scraper. Then use painter’s tape to mask off both sides of the gap for neatness purposes.
Next, load your caulking gun with caulk and apply steady pressure as you move it along in one continuous motion while holding it at an angle (45 degrees) towards yourself so that it fills up every nook and cranny in between without leaving any air pockets behind.
Once done applying enough amount of caulk into each window seam/gap/crevice; smooth out excess material with either finger dipped in water (for silicone-based products) or damp cloth/paper towel (for latex-based ones).
Allow time for drying before removing masking tape carefully not to damage fresh seals created by newly applied caulks.
Add Weatherstrip Under Sash

This method works best for double-hung windows, where the upper and lower sashes overlap. Over time, these overlapping areas can become worn or damaged, leading to air leaks.
To add weatherstripping under the sash:.
- Clean both surfaces thoroughly.
- Measure and cut a piece of adhesive-backed foam tape to fit along the bottom edge of the upper sash.
- Peel off one side of backing paper from foam tape and apply it along with top edge of lower window frame.
- Close window tightly so that adhesive sticks well on both sides.
This will create an airtight seal between your two window panes when they are closed together properly.
Add Weatherstrip to Large Cracks
Weatherstripping comes in various materials such as foam, vinyl, and rubber. It can be applied to the sash or frame of the window depending on where the gap is located.
To add weatherstrip to large cracks around your window frame:.
- Measure the length of each side of your window.
- Cut a piece of weatherstrip material that matches each measurement.
- Peel off one side of adhesive backing from each strip and apply it along one edge at a time.
- Press firmly into place with a putty knife or similar tool.
Make sure that you press down firmly on all sides so that there are no gaps between the material and surface area being sealed.
Caulk Small Cracks

Caulk is a flexible material that can be used to seal small gaps around your windows. It’s important not only for energy efficiency but also for keeping out moisture and preventing drafts.
To caulk small cracks, start by selecting a high-quality caulk that is appropriate for your window type and climate conditions. Next, use a putty knife or scraper tool to remove any old or loose caulking from around the window frame.
Once you’ve removed all of the old caulk, apply new bead of fresh caulk along each crack in one smooth motion using steady pressure on your gun trigger while moving at an even pace across each gap.
Be sure not overfill with too much caulking as this will create unsightly bumps which may affect how well it seals against drafts and moisture infiltration. Use a damp cloth or sponge dipped in water mixed with dish soap solution (or rubbing alcohol) wipe away excess residue before allowing it dry completely according manufacturer instructions.
Install Draft Stoppers
These simple devices can be purchased at most hardware stores, or you can make them yourself using materials like foam pipe insulation, old socks filled with rice or beans, or even a pool noodle cut to size.
To install a draft stopper for your window, simply measure the length of the gap between the bottom of the window and sill. Cut your chosen material to fit this length and insert it into place.
You may need to use adhesive strips or double-sided tape to keep it in place.
For added protection against drafts around windowsills, consider adding weatherstripping along any visible cracks where air could seep through. This will help ensure that no cold air enters your home during those chilly winter months.
Add Insulating Film to Window

This thin, transparent plastic sheeting can be applied directly onto the glass surface of a window, creating an additional layer of insulation that helps keep warm air inside during the winter months.
To apply insulating film, start by cleaning the window thoroughly with soap and water. Once dry, measure the dimensions of your window and cut a piece of film slightly larger than those measurements.
Apply double-sided tape around all four edges of the window frame before carefully pressing on top of it.
Next, use a hairdryer or heat gun to shrink-wrap the plastic tightly over each pane until it’s wrinkle-free. Be sure not to overheat any one area as this could cause damage or melting.
Insulating films are available in different grades for varying levels of insulation performance so choose one that suits your needs best based on climate conditions where you live.
Ensure Proper Seal

This will help prevent any future drafts or energy loss from occurring. To check for proper seal, close the window and run your hand around the edges to feel for any air leaks.
If you feel a draft, there may be an area that needs further attention.
Another way to test for proper seal is by using a candle or lighter flame near the edges of the window frame while closed. If there is a flicker in flame direction or if it goes out completely, this indicates an air leak.
If you find areas where additional sealing is needed after testing, go back and apply more caulk or weatherstripping as necessary until all gaps are filled and sealed tightly.
Monitor for Future Issues

Over time, weather conditions and normal wear and tear can cause sealant to crack or peel away from the window frame. This can lead to drafts and energy loss once again.
To prevent this from happening, make sure you inspect your windows regularly for any signs of damage or deterioration. Check the caulking around the edges of each window pane as well as any weatherstripping that may be in place.
If you notice any cracks or gaps forming in these areas, take action immediately by reapplying sealant where necessary. By staying on top of maintenance tasks like these, you’ll ensure that your home remains comfortable and energy-efficient all year round!
FAQ
What is the best way to seal around windows?
The best way to seal around windows is by using Loctite PL Window Door & Siding Polyurethane Sealant, as it provides permanent, water- and weather-resistant seals, and is durable, flexible, and resistant to UV radiation and ozone.
How do you seal a window from the inside?
To seal a window from the inside, use sealant or caulk to fill the space between the window trim and the wall, effectively filling gaps and sealing them tightly.
How do you seal a window pane?
To seal a window pane, utilize a putty knife to apply traditional glazing putty for a tighter bond and smoother surface.
What types of weatherstripping materials are most effective for sealing windows?
Types of weatherstripping materials most effective for sealing windows include adhesive-backed foam tape, V-strip, and door sweeps.
How can one properly detect air leaks around windows to determine the need for sealing?
One can properly detect air leaks around windows to determine the need for sealing by using the smoke test, where a lit incense stick or smoke pen is held near the window perimeter, observing the smoke’s movement to identify drafts.
What are the key steps to consider when caulking window gaps to ensure a proper seal?
The key steps to consider when caulking window gaps for a proper seal include cleaning the surface, applying caulk in a smooth, steady motion, and smoothing the caulk with a tool for an even, airtight finish.
Read More
 Aluminum Window Latch Replacement: A Simple Guide to Security and Style
 Custom Aluminum Window Screens Buying Guide
 Aluminum Window Removal Tool: Easy Steps for a Hassle-Free Window Replacement
 Screw for Aluminum Window Frame: Your Ultimate Fixing Guide
 Replace Aluminum Window Glass: A Beginner’s Guide to a Clearer View
Recap