Discover the essential steps to successfully tile around a window without trim, ensuring a polished and professional finish for your home improvement project.

Tiling around a window can be a tricky task, especially when there is no trim to cover up the edges. But fear not, because with the right tools and techniques, you can achieve a seamless and professional finish that will make your windows pop! In this blog post, we’ll guide you through the steps on how to tile around a window without trim.
So whether you’re renovating your bathroom or kitchen, or simply looking for some DIY inspiration, read on to discover our expert tips and tricks.
Key takeaways:
- Choose smaller tiles for easier installation.
- Measure the window area accurately before tiling.
- Clean and prepare the surface before tiling.
- Install tile backer board for stability.
- Use tile spacers for even grout lines.
Choosing the Right Tiles

The first thing you need to consider is the size of your tiles. Large format tiles can be difficult to cut and install around window frames, so smaller sizes are often recommended.
Another important factor is the material of your tile. Porcelain or ceramic tiles are popular choices due to their durability and water resistance, making them ideal for areas such as bathrooms or kitchens where moisture levels may be high.
You should also think about color and texture when selecting your tile. Lighter colors can help make a small space feel larger while darker shades add depth and drama.
Textured finishes like matte or glossy can create different effects depending on lighting conditions in the room.
Measuring Window Area for Tiling
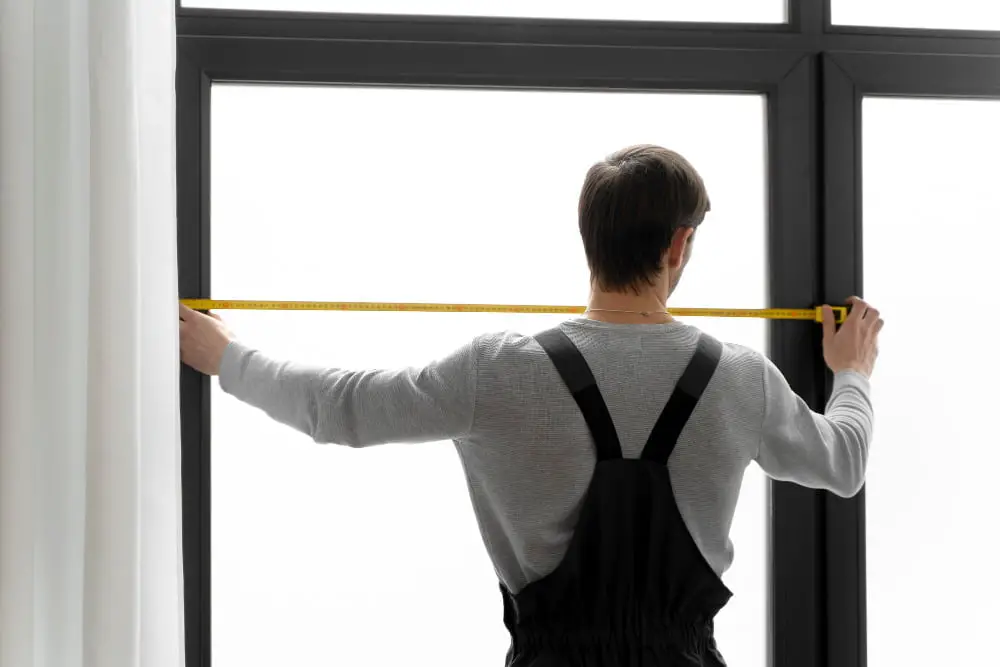
This will help you determine how many tiles you need and ensure that they fit perfectly around the window frame. To get started, use a tape measure to measure the height and width of your window opening from edge to edge.
Be sure to include any gaps or spaces between the frame and wall in your measurements.
Next, calculate how many tiles you’ll need by dividing the total area of your measured space by each tile’s surface area (minus any cuts). It’s always best practice to order extra tiles just in case some break during installation or for future repairs.
Preparing the Surface
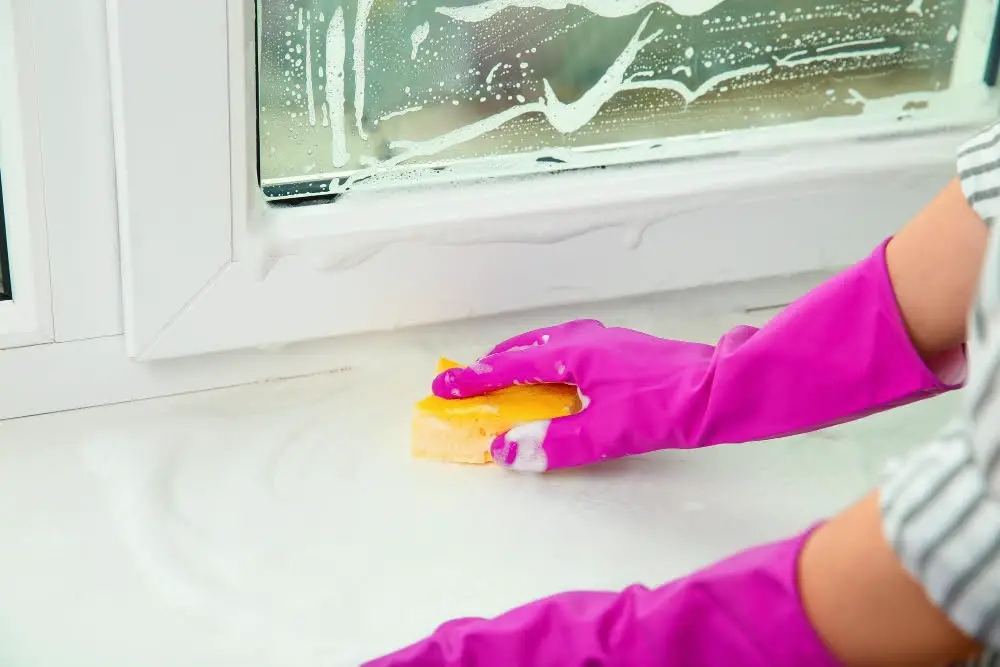
This will ensure that the tiles adhere correctly and create a smooth finish. Begin by cleaning the area around your window thoroughly with soap and water, removing any dirt or debris that may be present.
Next, use a scraper or putty knife to remove any old adhesive or caulk from previous installations. If there are large gaps between the wall and window frame, fill them in with expanding foam insulation before proceeding.
Once you’ve cleaned up all debris and filled in gaps as needed, sand down any rough spots on the wall using fine-grit sandpaper until it feels smooth to touch. Wipe down everything again with a damp cloth to remove dust particles before moving onto installing tile backer board.
Installing Tile Backer Board
Installing tile backer board is an essential step in creating a sturdy and stable base for your tiles. This material provides a flat and even surface that will prevent any movement or shifting of the tiles over time.
To install tile backer board, first measure the area around your window and cut the boards to size using a circular saw or jigsaw. Then, apply thin-set adhesive to both sides of each board before screwing them into place with cement screws.
Make sure that each piece of backer board is level with one another by using shims if necessary. Once all pieces are installed securely, tape all seams with fiberglass mesh tape before applying thin-set adhesive over top.
Laying Out Tile Design
This step is crucial in ensuring that your tiles are evenly spaced and aligned around the window. Start by finding the center point of your window and marking it with a pencil.
From there, use a level to draw vertical lines on either side of the center point.
Next, determine how many tiles will fit horizontally across each row above and below this central line while maintaining even spacing between them (taking into account any cuts needed). Use spacers or tape to mark where each tile should be placed along these horizontal lines.
Dry-fit some tiles around one side of your marked-out area before applying adhesive so that you can adjust their placement as necessary for an even look overall.
Cutting Tiles to Fit
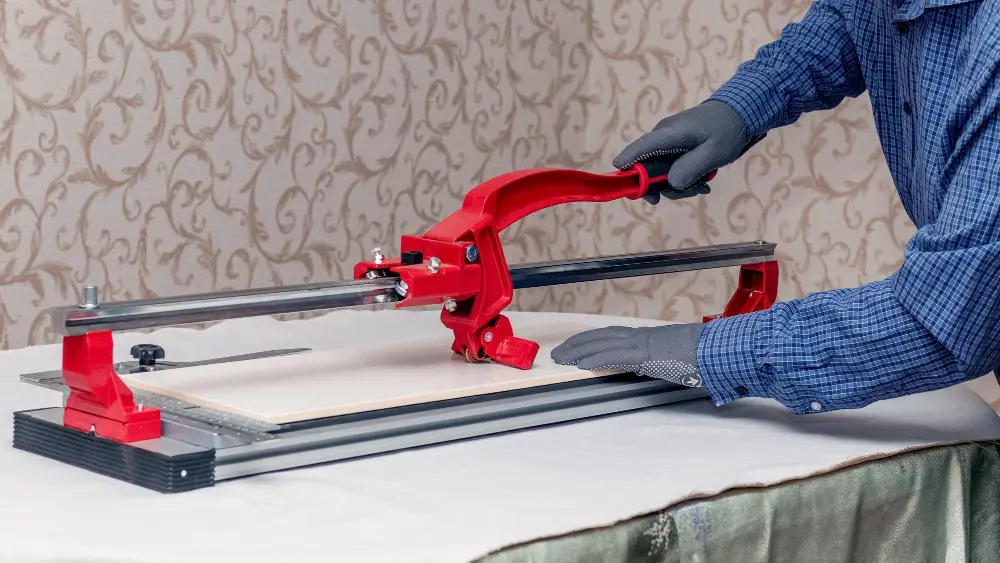
This is where precision and accuracy are crucial for achieving a professional finish. To cut tiles, you will need a tile cutter or wet saw depending on the type of tile being used.
When using a manual tile cutter, place the tile face up on the machine with its edge aligned with the blade. Score along your marked line by pressing down firmly on both ends of the handle while keeping it level.
Then use gentle pressure to snap off any excess pieces along that scored line.
For more complex cuts or curves, use an electric wet saw which uses water-cooled diamond blades for precise cuts without damaging delicate materials like glass or porcelain.
Remember always wear protective gear such as gloves and goggles when handling tools during this process.
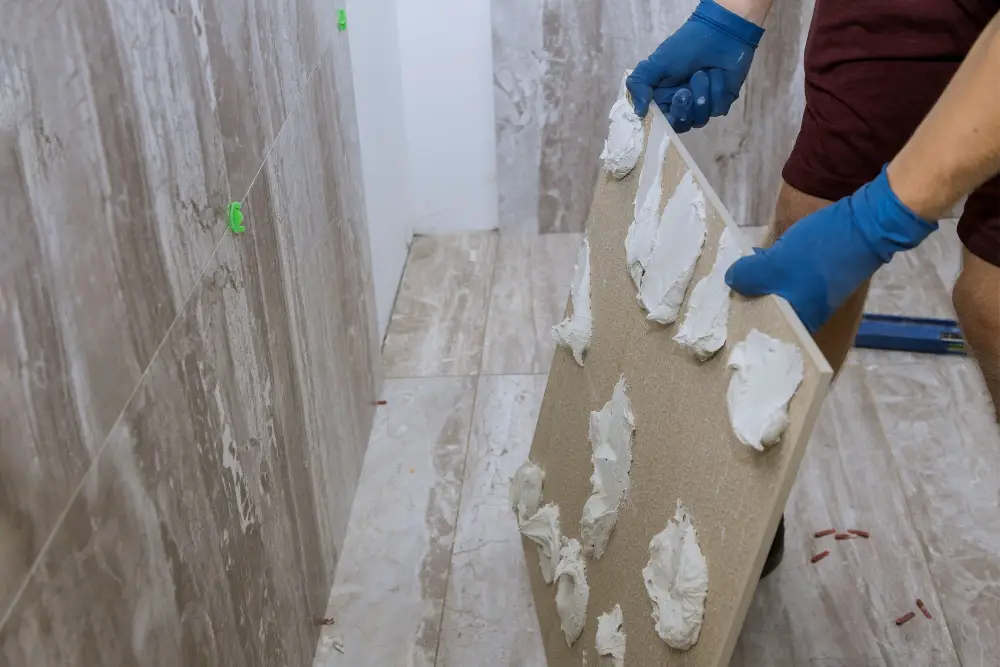
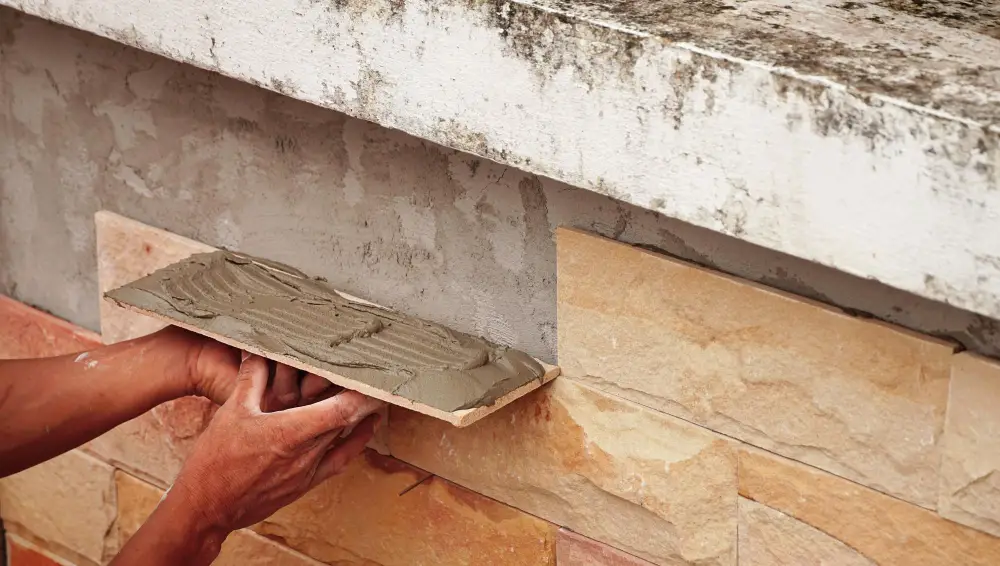
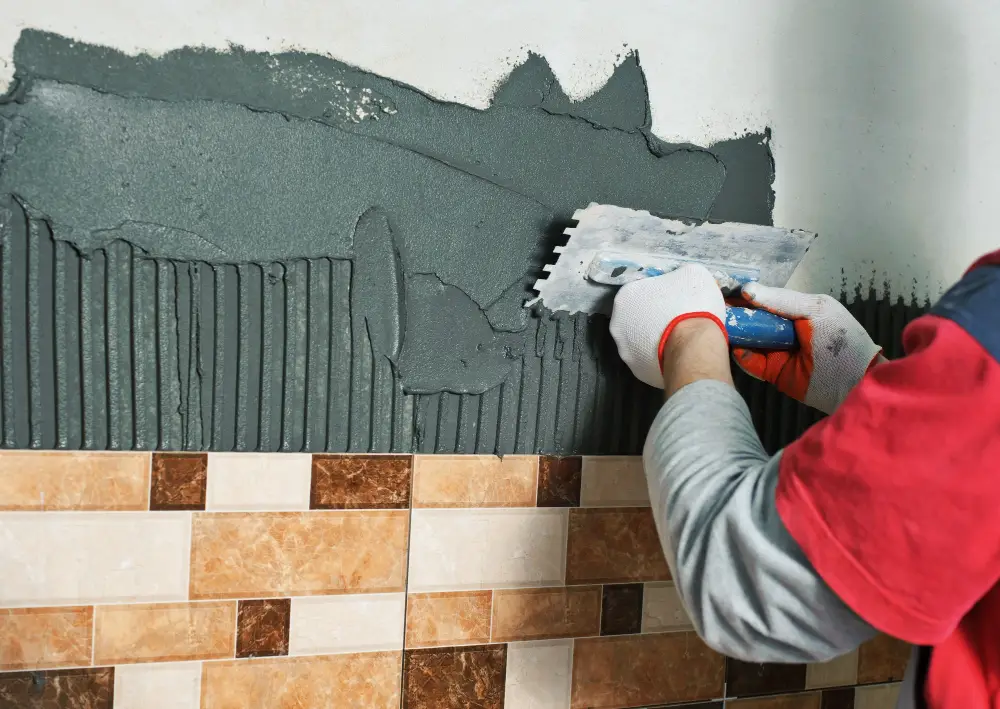
Applying Tile Adhesive
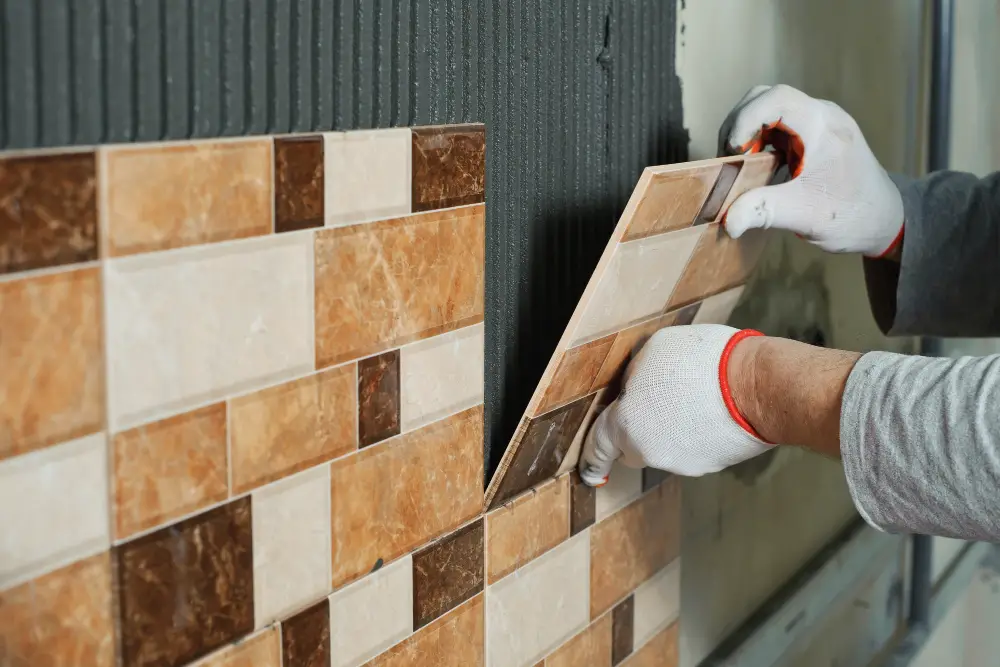
This is a crucial step in ensuring that your tiles stay in place and don’t shift over time. Start by applying a layer of adhesive onto the back of each tile using a notched trowel, making sure to cover the entire surface area.
Next, carefully press each tile into place on the wall around the window. Use spacers between each tile for even grout lines and adjust as necessary until you achieve your desired layout.
Be sure to work quickly when applying adhesive as it can dry out fast. Only spread enough for one or two tiles at a time before placing them on the wall.
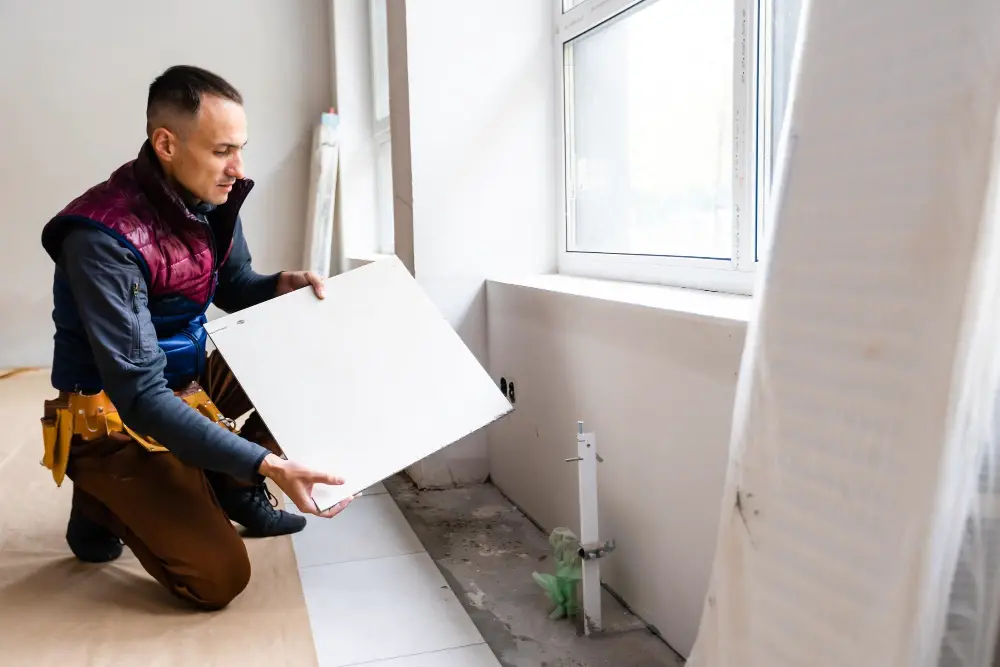
Setting Tiles Around Window
Begin by applying a layer of tile adhesive onto the backer board using a notched trowel. Then, carefully press each tile into place, making sure they are level and evenly spaced.
When setting tiles around windows without trim, it’s important to pay extra attention to detail as any mistakes will be more noticeable. Take your time and work methodically from one side of the window frame towards the other.
If you need to make any adjustments or reposition tiles while they’re still wet with adhesive, do so quickly before it dries out completely. Once all of your tiles are set in place and aligned correctly with each other and surrounding surfaces like countertops or walls (if applicable), allow them some time for drying before moving on with grouting process.
Spacer Placement for Even Grout Lines
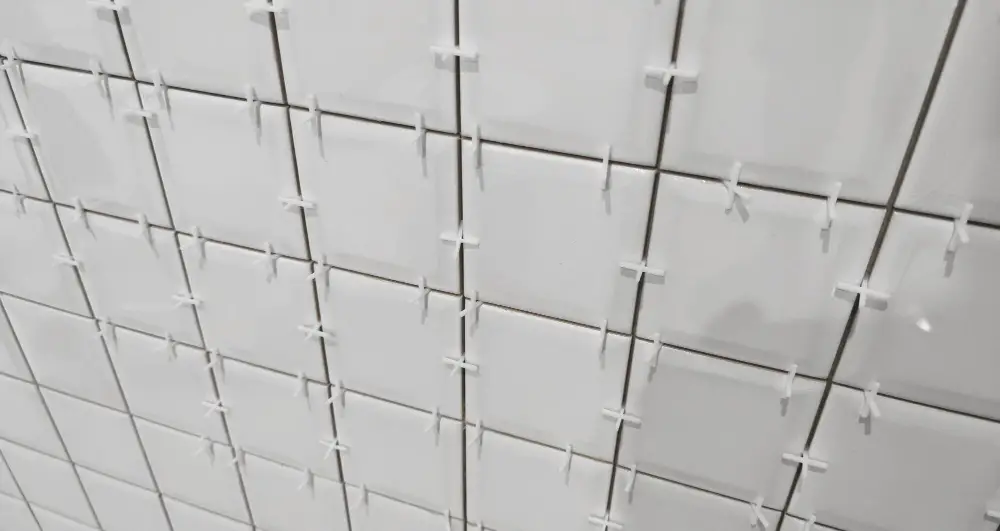
This is where tile spacers come in handy. Tile spacers are small plastic pieces that help maintain consistent spacing between tiles and create even grout lines.
To use tile spacers, simply place them at each corner of the tile as you lay them out around the window frame. The size of your spacer will depend on how wide you want your grout lines to be – typically 1/8 inch or 3/16 inch is standard.
It’s important to make sure that all of your tiles are level with one another before placing the spacer in between them. Once all four corners have been spaced out, continue laying down more tiles until you’ve completed tiling around the entire window area.
Trimming Excess Tile Adhesive
This step is crucial for achieving a clean and polished finish. To do this, use a utility knife or grout saw to carefully remove any adhesive that has squeezed out from between the tiles.
Be sure not to damage the surrounding tiles while trimming away excess adhesive. Take your time and work slowly, making small cuts until all of the excess material has been removed.
After trimming away all of the extra tile adhesive, allow it to dry completely before moving on with grouting.
Allowing Tile Adhesive to Set
This process typically takes between 24 and 48 hours, depending on the type of adhesive used and environmental factors such as temperature and humidity.
During this time, avoid touching or disturbing the tiles in any way. You may also want to cover them with a protective layer such as plastic sheeting or cardboard if there is a risk of accidental damage.
It’s crucial that you give your tile adhesive enough time to set properly before proceeding with grouting. Rushing this step can result in uneven grout lines or even cause tiles to become loose over time.
Removing Tile Spacers

This is a crucial step in achieving even grout lines and a professional finish. Start by gently tapping each spacer with a rubber mallet or hammer until they loosen up.
Then, use pliers to pull them out one by one.
Be careful not to damage any of the tiles while removing spacers as this can ruin all your hard work so far! If you notice that some of the tiles are moving or shifting when you remove spacers, apply more pressure on those areas using your hands before continuing with spacer removal.
Applying Window Sill Tile

Applying tile to a windowsill is not only functional but also adds an extra touch of style and sophistication. To begin, measure the length and width of your windowsill and cut tiles accordingly using a tile cutter or wet saw.
Next, apply adhesive directly onto the surface of your windowsill with a trowel. Carefully place each tile onto the adhesive in your desired pattern until all areas are covered.
Be sure that each piece is level with one another by using spacers between them as needed. Once all pieces are in place, allow them to dry for at least 24 hours before grouting.
Mixing and Applying Grout
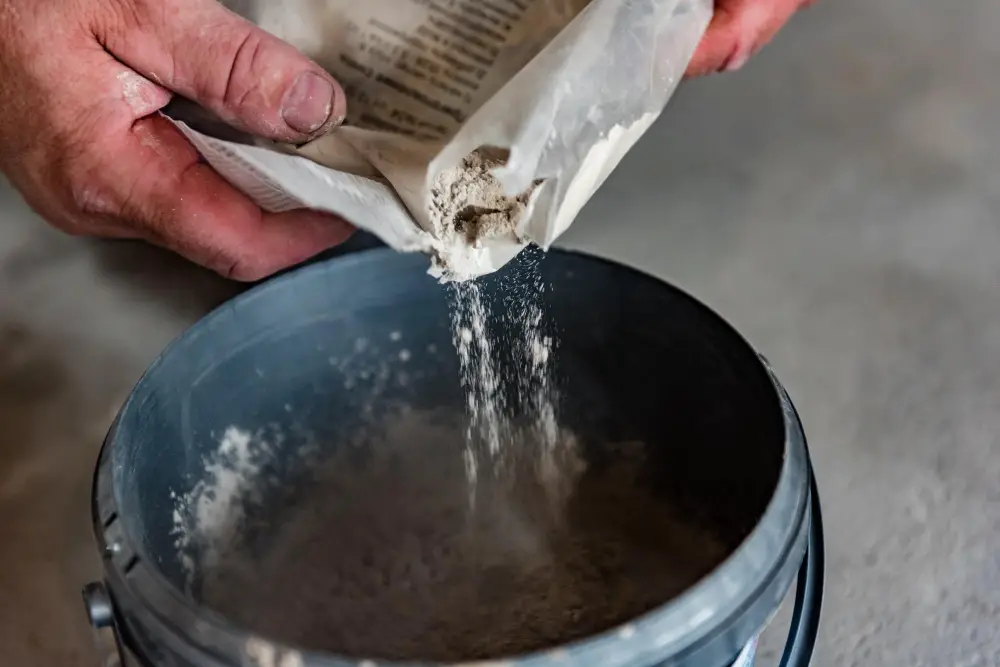
Grout is a cement-based material that fills in the gaps between tiles, providing stability and preventing moisture from seeping through. To mix grout, follow the manufacturer’s instructions carefully.
Typically, you’ll need to add water gradually until you achieve a smooth consistency.
Using a rubber float or trowel, spread the grout over your tiled surface at an angle of 45 degrees to ensure full coverage of all joints. Work in small sections at a time so that you can clean up any excess before it dries out.
After applying enough grout on one section of tiles (usually about 10 square feet), use your float or trowel held flat against the surface to remove any excess by scraping diagonally across each joint line while holding tool almost perpendicular with wall/floor. Allowing some drying time for about 15-20 minutes will allow for easier cleaning without removing too much fresh wet-grouted areas when wiping off residue later on using damp sponge/cloth.
Finally wipe down with damp cloth/sponge several times until no haze remains on tile surfaces after which leave it alone for another day before sealing them properly as per manufacturer’s recommendations.
Cleaning Grout Residue

This will ensure that your tiles look their best and that the grout lines are even. To clean up excess grout, use a damp sponge or cloth to wipe away any residue from the surface of the tiles.
Be sure not to press too hard on the tiles as this can cause them to shift out of place.
After wiping down all surfaces with a damp cloth or sponge, allow some time for everything to dry completely before proceeding with sealing your newly tiled window area.
Cleaning up excess grout is an essential step in achieving a polished finish when tiling around windows without trim.
Allowing Grout to Dry
This can take anywhere from 24-48 hours depending on humidity levels and temperature. It’s crucial not to rush this process as any movement or disturbance during drying time can cause cracks in your grout lines.
To ensure that your tiles look their best, avoid walking or placing anything heavy on them until they are fully set. You may also want to cover them with a protective sheet if necessary.
After allowing sufficient drying time for the grout, use a damp sponge or cloth and gently wipe away any remaining haze left behind by excess grout residue. Be careful not to scrub too hard as this could damage your newly installed tiles.
Sealing Grout Lines
Sealing will also help prolong the life of your tiles and keep them looking new for longer. To seal your grout lines, you’ll need a high-quality sealer that is specifically designed for use on tile surfaces.
Before applying any sealer, make sure that your tiles are clean and free of any debris or residue. You can use a damp cloth or sponge to wipe down each tile surface carefully.
Next, apply the sealer using a small brush or roller directly onto each grout line in thin coats until all areas are covered evenly. Be careful not to get any excess sealer on your tiles as this may cause discoloration over time.
Allow ample time for drying before exposing it again with water (usually 24-48 hours). Once dry, test if there is still water repellency by sprinkling some drops of water into its surface; if they bead up then you’re good!
Benefits of Not Using Trim
Firstly, it creates a sleek and modern look that is perfect for contemporary homes. Without the added bulk of trim, your tiles will seamlessly blend into the surrounding walls and create a clean finish.
Secondly, not using trim can save you money on materials and installation costs. Trim pieces can be expensive to purchase and install, especially if you need custom sizes or shapes to fit around unique window designs.
Lastly, omitting trim also means less maintenance in the long run as there are fewer areas for dirt or grime to accumulate over time. This makes cleaning easier while keeping your home looking fresh all year round.
Tips for Specific Window Locations (shower, Kitchen)
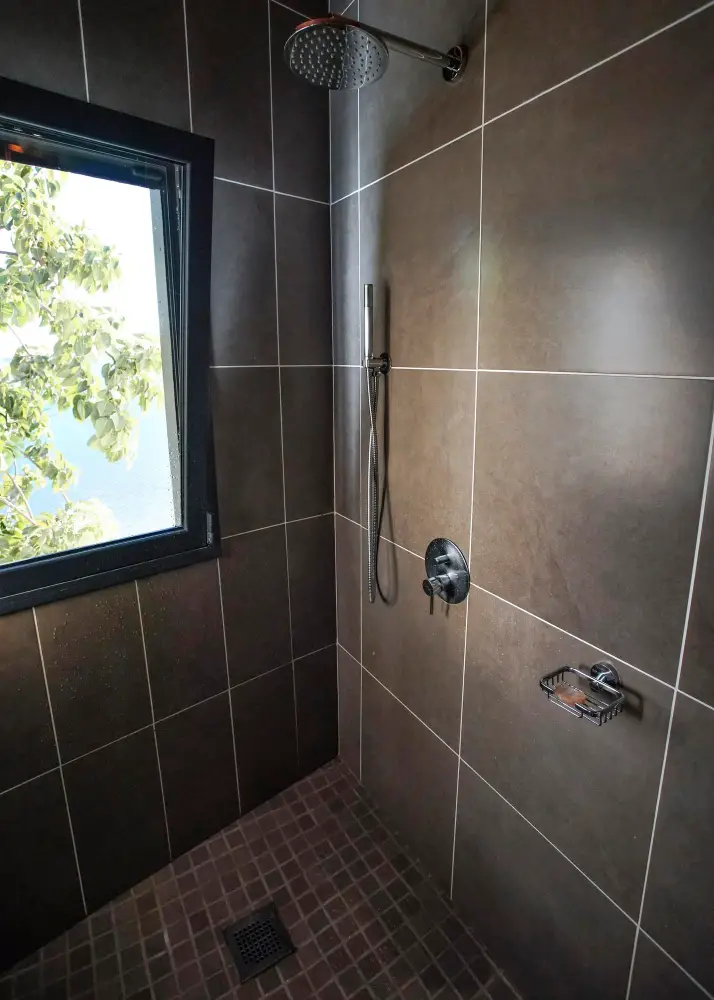
In the shower, it’s important to use waterproof tiles and grout that can withstand moisture and prevent mold growth. Consider using smaller tiles for better traction on wet surfaces.
In the kitchen, you may want to choose heat-resistant tiles near stovetops or ovens. It’s also essential to ensure that your tile design complements your countertop material and backsplash for a cohesive look.
No matter where you’re tiling around windows, always take accurate measurements before starting any work. This will help avoid costly mistakes down the line and ensure a professional finish every time!
FAQ
Can you tile around a window without trim?
Yes, you can tile around a window without trim, which is a unique approach often used in kitchens and bathrooms to create a modern look and tie in the room themes.
What tile trim to use around a window?
Around a window, it is preferable to use plastic or metal tile corner trims for a neat look with round corners and easier alignment.
How do you properly measure and cut tiles for a window area?
To properly measure and cut tiles for a window area, accurately measure the dimensions of the window and surrounding space, mark the tiles accordingly, and use a tile cutter to ensure clean, precise cuts.
Which tile layout patterns work best for tiling around windows?
The tile layout patterns that work best for tiling around windows are brick, herringbone, and grid.
Are there any special considerations for selecting the right adhesive for window tiling projects?
Selecting the right adhesive for window tiling projects involves considering factors such as the type of tiles, surface material, and the environmental conditions where the tiles will be installed.
Read More
 Aluminum Window Latch Replacement: A Simple Guide to Security and Style
 Custom Aluminum Window Screens Buying Guide
 Aluminum Window Removal Tool: Easy Steps for a Hassle-Free Window Replacement
 Screw for Aluminum Window Frame: Your Ultimate Fixing Guide
 Replace Aluminum Window Glass: A Beginner’s Guide to a Clearer View
Recap