Discover the essential steps to achieving a professional finish when tiling around a window, enhancing your home’s interior with ease.

Tiling around a window can be a daunting task, but it’s an important step in achieving a polished and professional finish for your home renovation project. Whether you’re updating your bathroom or kitchen, learning how to tile around a window will give your space an added touch of elegance and sophistication.
In this blog post, we’ll guide you through the process of tiling around a window with ease and precision. So grab your tools and let’s get started!
Key takeaways:
- Choose the right type of tile for window areas.
- Consider the tile size for the desired aesthetic.
- Measure the window accurately to determine the number of tiles needed.
- Gather necessary tools such as a tile cutter and adhesive spreader.
- Prepare the window surface by removing old tiles and leveling.
Types of Tiles for Window Areas

When it comes to tiling around a window, choosing the right type of tile is crucial. Not all tiles are created equal, and some may not be suitable for use in areas with high moisture or temperature fluctuations.
Ceramic and porcelain tiles are popular choices for window areas due to their durability and resistance to water damage. Glass tiles can also add a touch of elegance while allowing natural light into the room.
Natural stone tiles such as marble or granite can provide an upscale look but require more maintenance than other types of tile due to their porous nature. It’s important to consider factors such as cost, style preference, and practicality when selecting your tile material.
In addition to considering the type of tile material you’ll use around your windows, you should also think about color schemes that complement your existing decor scheme while adding visual interest through texture or patterned designs.
Choosing the Right Tile Size

The size of your tiles will determine how many you need and how they fit together on the wall. Larger tiles can make a small space feel more spacious, while smaller tiles can create intricate patterns and designs.
Consider the overall look you want to achieve in your room when selecting tile sizes for your window area. If you’re going for a modern or minimalist aesthetic, larger rectangular-shaped tiles may be ideal as they provide clean lines and fewer grout joints.
On the other hand, if you prefer an intricate design with lots of detail work or have limited space around your window frame, smaller mosaic-style pieces could be perfect for creating unique patterns that add visual interest without overwhelming the eye.
Ultimately, it’s important to choose tile sizes that complement both your personal style preferences and practical needs such as ease of installation and maintenance requirements.
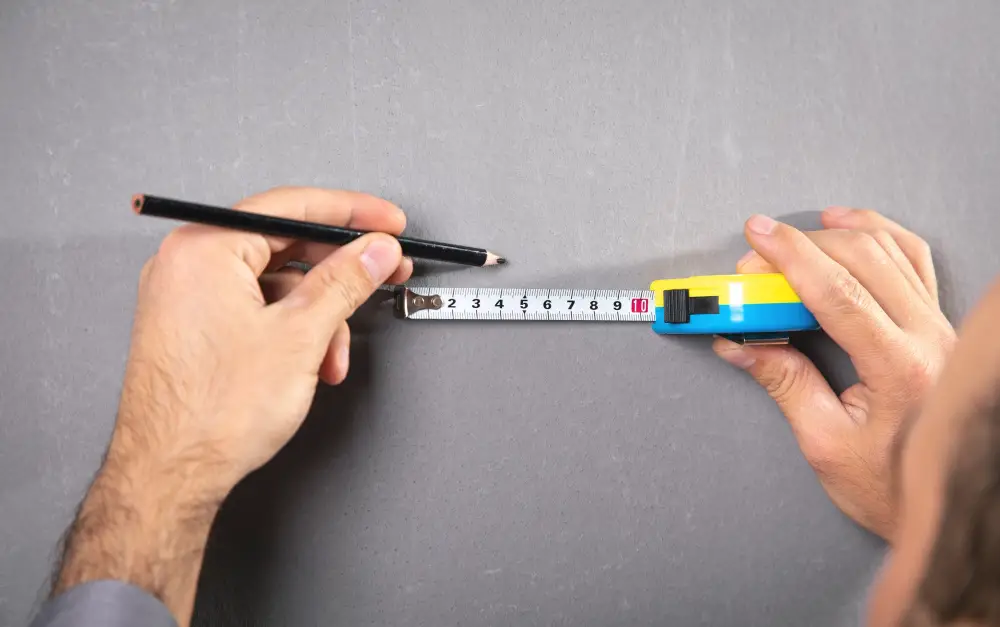
Measuring the Window for Tiling
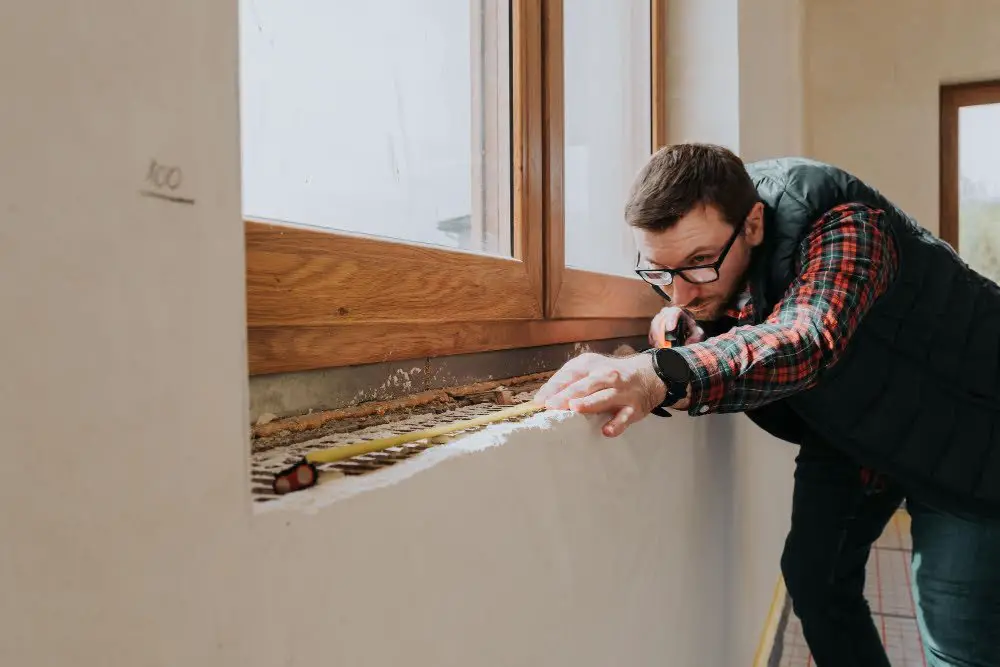
Measuring the window will help you determine how many tiles you need and what size they should be. To get started, use a tape measure to measure the height and width of your window opening from edge to edge.
When measuring for tiles, it’s important to take into account any obstructions such as handles or locks that may affect tile placement. You’ll also want to consider whether or not you want full tiles at either end of the row or if partial cuts are acceptable.
Once you have measured all sides of your window opening, add an extra 10% for waste and breakage when ordering materials. This additional amount ensures that there is enough material on hand in case some pieces need replacing during installation.
Gathering Necessary Tiling Tools
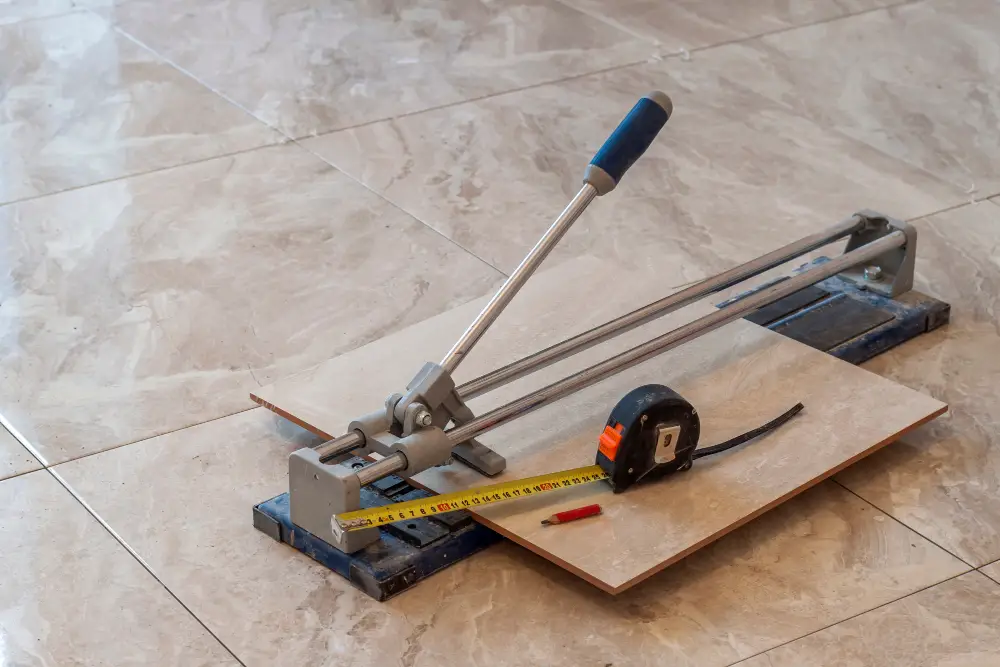
Having everything you need at hand will save time and ensure a smooth workflow. Here are some of the basic tools required for tiling around a window:
- Tile cutter or tile saw
- Measuring tape
- Spirit level
- Notched trowel or adhesive spreader
- Tile spacers (1/8 inch)
- Grout float
- Rubber mallet
- Safety goggles and gloves
Make sure that your tile cutter is suitable for cutting tiles of different thicknesses, as well as curved cuts if needed. A measuring tape will help you determine how many tiles you’ll need to cover your window area accurately.
A spirit level is crucial in ensuring that your tiles are straight and even during installation. The notched trowel or adhesive spreader helps apply an even layer of adhesive on the wall surface before placing each tile.
Tile spacers come in handy when creating uniform gaps between each tile, while a grout float helps apply grout evenly into joints between tiles.
Lastly, safety goggles and gloves protect against any potential accidents during cutting or handling sharp-edged materials like glass mosaic tiles.
Preparing the Window Surrounding Surface
This step is crucial in ensuring that your tiles adhere correctly and remain firmly in place for years to come. Begin by removing any old or damaged tiles from the area using a chisel and hammer.
Next, clean the surface thoroughly with a damp cloth or sponge to remove any dirt, dust, or debris.
If there are any cracks or holes on the wall surrounding your window frame, fill them with an appropriate filler material such as spackle paste before proceeding further. Allow sufficient time for drying before sanding down uneven surfaces until they’re smooth.
Once you’ve cleaned and repaired all damages on the wall surface around your window frame successfully, use a spirit level tool to check if it’s even horizontally and vertically aligned accurately. If not leveled correctly at this stage of preparation can lead to crooked tile installation later on.
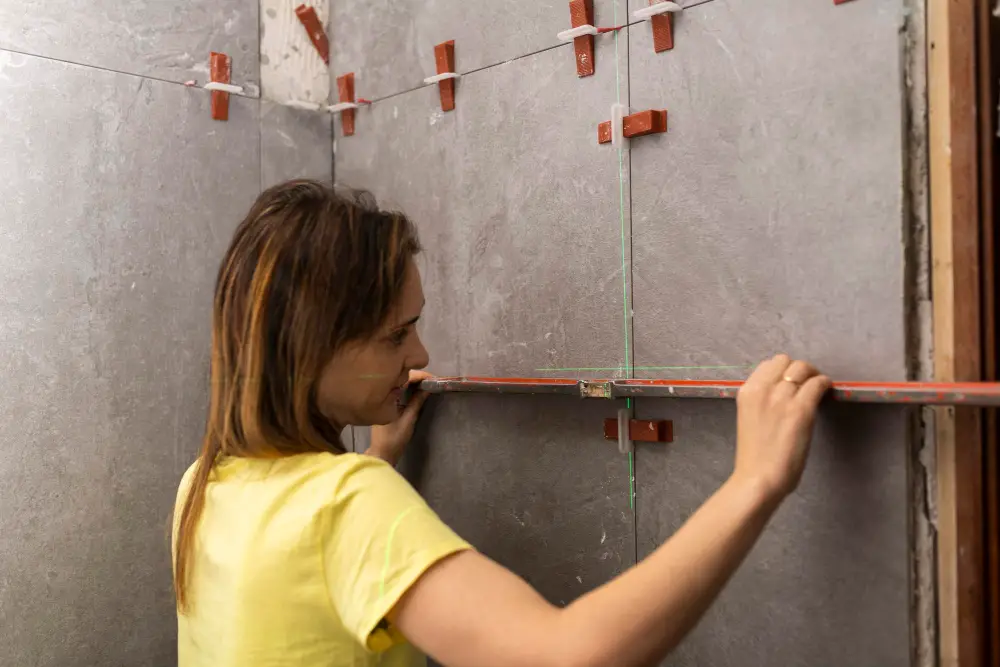
Marking Reference Lines On the Wall
This step will help ensure that your tiles are level and symmetrical, creating a professional finish. To do this, use a spirit level to draw vertical and horizontal lines on the wall where you plan to tile.
Start by measuring from the top of your window frame down to where you want your first row of tiles to sit. Then use a pencil or chalk line tool (if available) and draw a straight horizontal line across this point.
Next, measure from each side of the window frame outwards in equal distances until you reach an area where there is enough space for at least one full tile plus grout width on either side of centerline; then mark these points with vertical lines intersecting with previously drawn horizontal line.
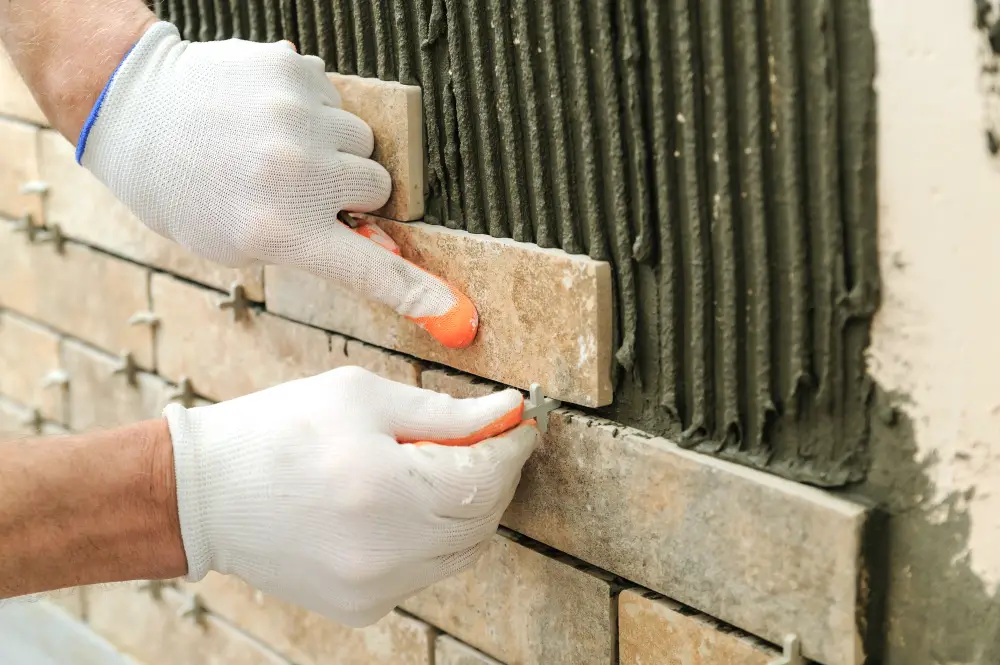
Applying Tile Adhesive
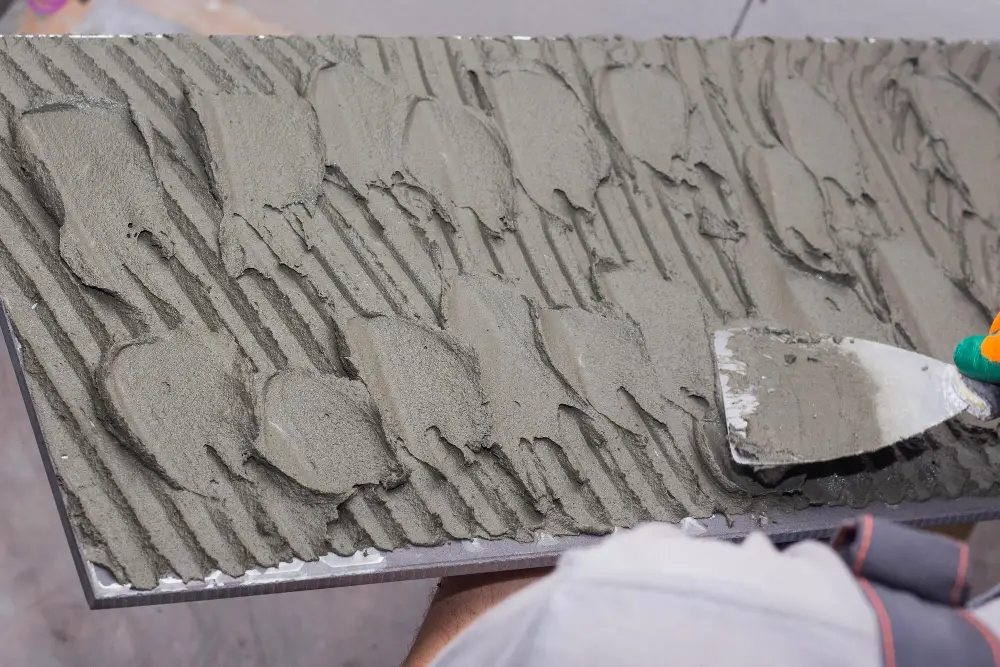
This is a crucial step in ensuring that your tiles stay in place and don’t shift over time. Begin by mixing the adhesive according to the manufacturer’s instructions, making sure that it has a smooth consistency without any lumps.
Using a notched trowel, spread an even layer of adhesive onto the wall where you will be placing your first row of tiles. Make sure to only apply enough for one or two rows at a time so that it doesn’t dry out before you can lay down all of your tiles.
When applying tile adhesive around windows, take extra care around corners and edges as these areas are more prone to cracking or shifting over time if not properly secured with enough glue.
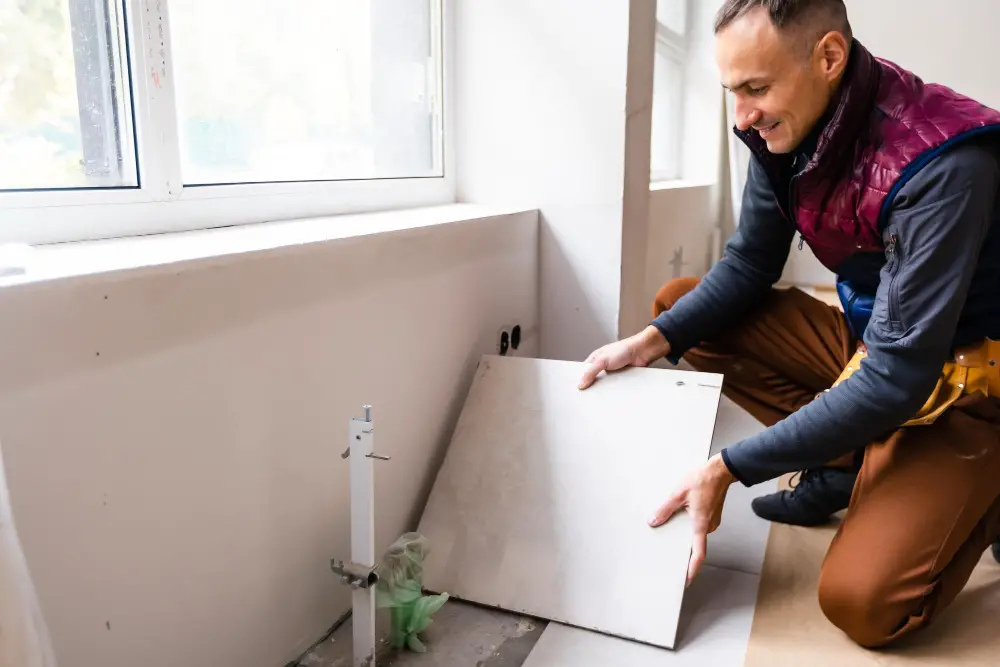
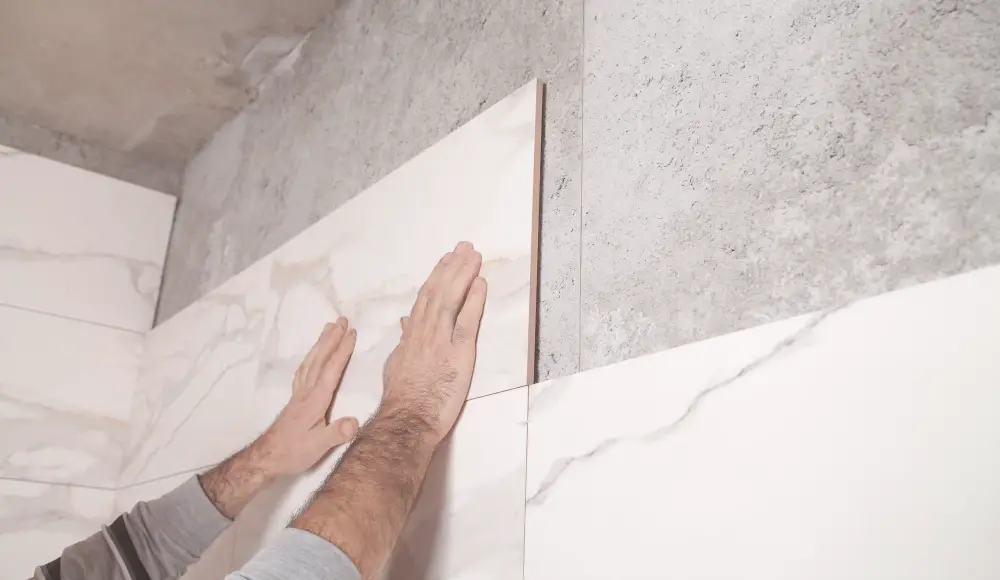
Setting the First Row of Tiles
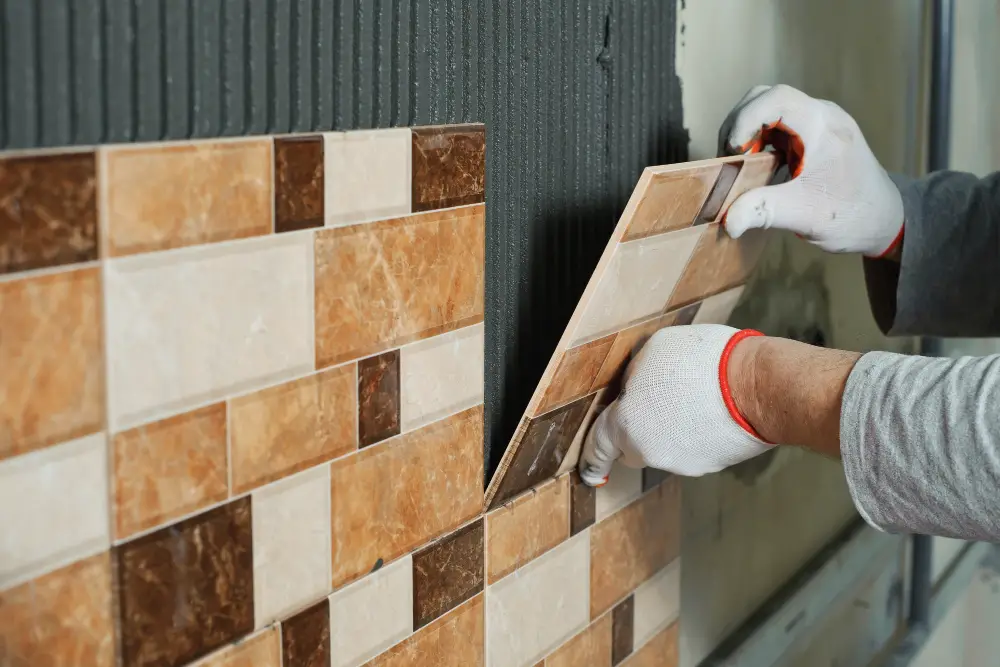
This is a crucial step in ensuring that your tiling project looks professional and polished. Begin by applying tile adhesive to a small section of the wall using a notched trowel, making sure to spread it evenly.
Next, carefully place your first tile onto the adhesive at one end of your reference line. Press down firmly on each corner and edge with slight twisting motions until it is level with surrounding tiles or surfaces.
Continue adding more tiles along this row until you reach either side of the window frame or sill if applicable. Use spacers between each tile for even spacing and alignment.
Remember that precision is key when setting these initial rows as they will serve as guides for all subsequent rows above them.
Using Tile Spacers
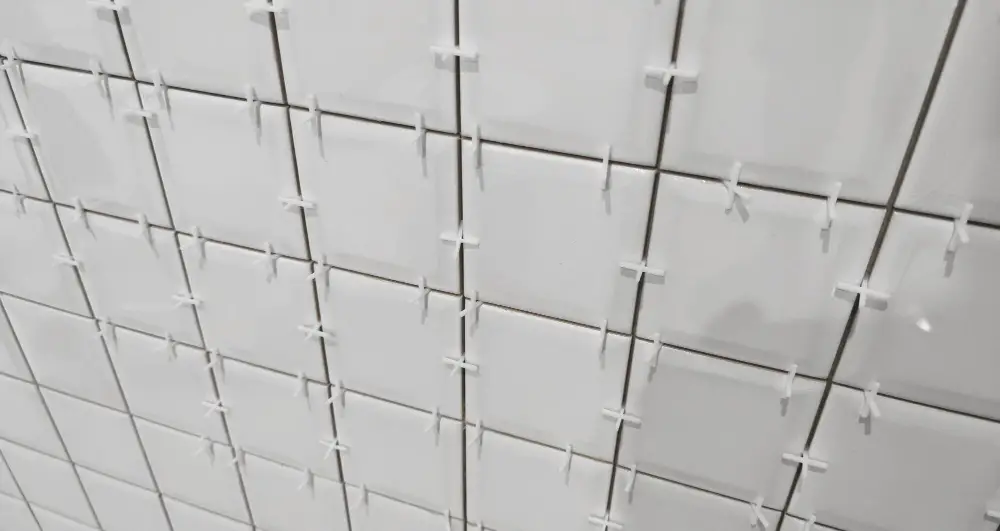
These small plastic pieces are essential for maintaining an even gap between each tile and ensuring a professional finish. Tile spacers come in different sizes, so make sure to choose the right one for your project.
To use them correctly, simply place them at each corner of the tile where it meets another one and gently press down until they’re level with the surface. This will create a consistent spacing between all tiles that will help keep everything aligned as you continue tiling around your window.
It’s important not to rush this step or skip using spacers altogether because uneven gaps can lead to crooked lines or unsightly grout joints later on.
Cutting Tiles for the Window Frame
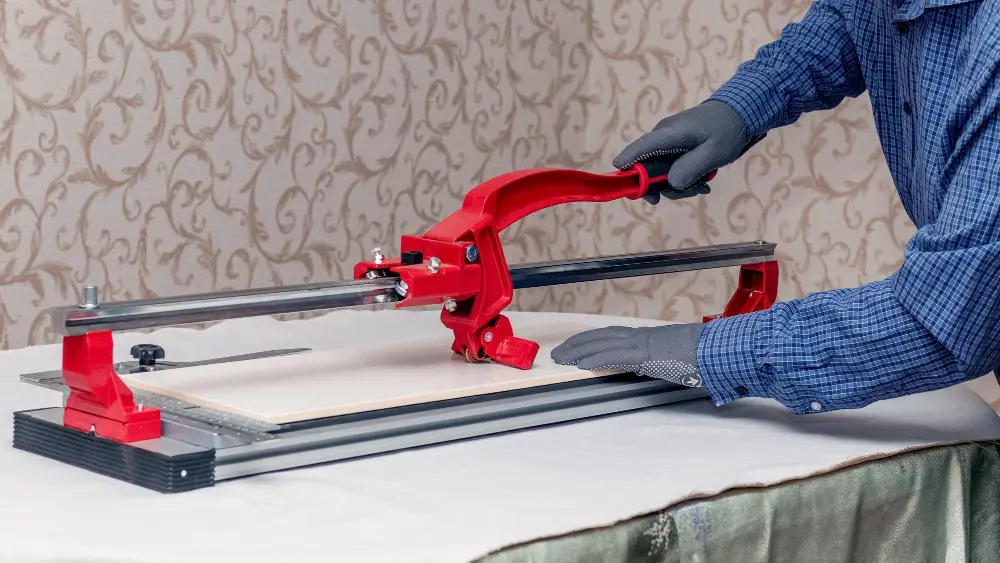
This step is crucial in achieving a professional finish and ensuring that your tile pattern remains symmetrical. To begin, measure each section of the frame where you need to place a tile carefully.
Using a tile cutter or wet saw, score along each measurement line on your chosen tile before breaking it into two pieces with pliers. If there are any curved areas around an arch-shaped window or other unique shapes that require cutting, use specialized tools like nippers or angle grinders.
Remember always to wear protective gear when cutting tiles as they can be sharp and cause injury if not handled correctly. Take extra care when working with small pieces as they can easily break during handling.
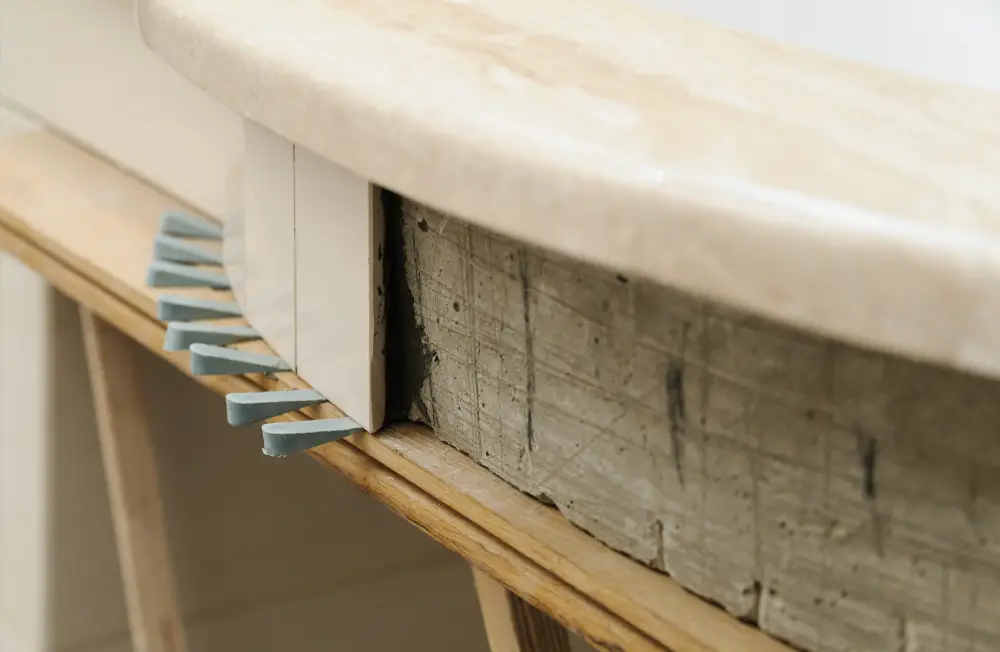
Tiling Around the Window Sill

This is an important step in achieving a professional finish for your project. To begin, measure and cut tiles that will fit snugly against the edge of the sill.
Apply adhesive to both the back of each tile and onto the surface of your work area.
Carefully place each tile onto its designated spot while making sure they are level with one another using a spirit level or laser level tool. Use spacers between tiles as needed.
When all tiles have been placed, allow them to set overnight before removing any spacers or excess adhesive from joints with a grout scraper tool.
Apply grout into all gaps between tiles using a rubber float tool at 45-degree angles until completely filled up then wipe off any excess grout from surfaces with damp sponge/cloth before allowing it dry for about 24 hours.
Tiling Above the Window
This area can be a bit tricky since it requires cutting tiles at an angle to fit snugly against the wall. To begin, measure and mark where you want your tiles to end above the window frame using a level or straight edge.
Then, cut your tiles accordingly with a tile cutter or wet saw.
When installing these angled pieces of tile, make sure they are flush with both sides of the wall for symmetry purposes. Use spacers between each tile for even spacing and apply adhesive generously before pressing them into place.
Remember that precision is key when tiling around windows as any mistakes will be easily noticeable once completed. Take extra care when measuring angles and cutting tiles so that everything lines up perfectly in this final step.
Tiling the Window Sides
This step is crucial in achieving a seamless finish that will make your windows stand out. To tile around the sides of your window, start by measuring and cutting tiles that fit perfectly into each side space.
Apply adhesive onto one side of the wall using a notched trowel, then press each tile firmly into place while ensuring they are level with those already installed above or below them. Use spacers between tiles for even spacing and maintain symmetry throughout this process.
Repeat this process on both sides until all spaces are filled with tiles. Once complete, allow sufficient drying time before removing spacers and applying grout along all joints between adjacent tiles.
Cutting Curved Tiles for Arch Windows
With some patience and careful measuring, it’s possible to achieve a seamless finish that complements your home’s architecture.
To begin with, measure the width of the arch at its widest point and mark this measurement on your tile. Then use a tile cutter or wet saw to cut along this line.
Next, place each cut tile in position around the arch until you reach both sides of it.
At this point, take measurements from one side of the arch to another at several points along its length. Use these measurements as guides for cutting smaller pieces that will fill in any gaps between full-size tiles.
Once all pieces are cut and fitted together like puzzle pieces around your arched window frame using adhesive or mortar mixtures designed specifically for tiling purposes; apply grout into joints between them before cleaning excess off surfaces using damp sponge followed by sealing process if necessary according manufacturer instructions provided on product labels used during installation process.
Maintaining Symmetrical Tile Patterns
This means ensuring that the tiles on either side of the window are evenly spaced and aligned with each other. To achieve this, start by marking reference lines on the wall using a level and chalk line.
Next, lay out your tiles along these lines before fixing them in place with adhesive. Use tile spacers to ensure even spacing between each tile and adjust as necessary until you’re happy with their placement.
If you’re working with an arch-shaped window or curved surface, cutting curved tiles can be challenging but is crucial for maintaining symmetry in your design. Consider using specialized tools such as a wet saw or angle grinder to cut precise curves into your tiles.
Tile Edging and Trim Options
Tile edging and trim options can help create a polished look for your tiled window area. There are various tile edging and trim options available in the market that can complement any style or design preference.
One popular option is metal edge trims, which come in different finishes such as chrome, brass, or stainless steel. These trims provide a sleek and modern look while also protecting the edges of your tiles from chipping.
Another option is bullnose tiles that have one rounded edge designed specifically for creating clean edges on walls with exposed tile ends. Bullnose tiles come in various sizes to match different types of wall tiles.
For those who prefer a more natural finish, wood moldings are an excellent choice as they blend well with wooden frames surrounding windows while providing protection against moisture damage.
Choosing the right tile edging and trim will not only enhance the overall appearance of your tiled window but also protect it from wear-and-tear over time.
Applying Grout to Tile Joints
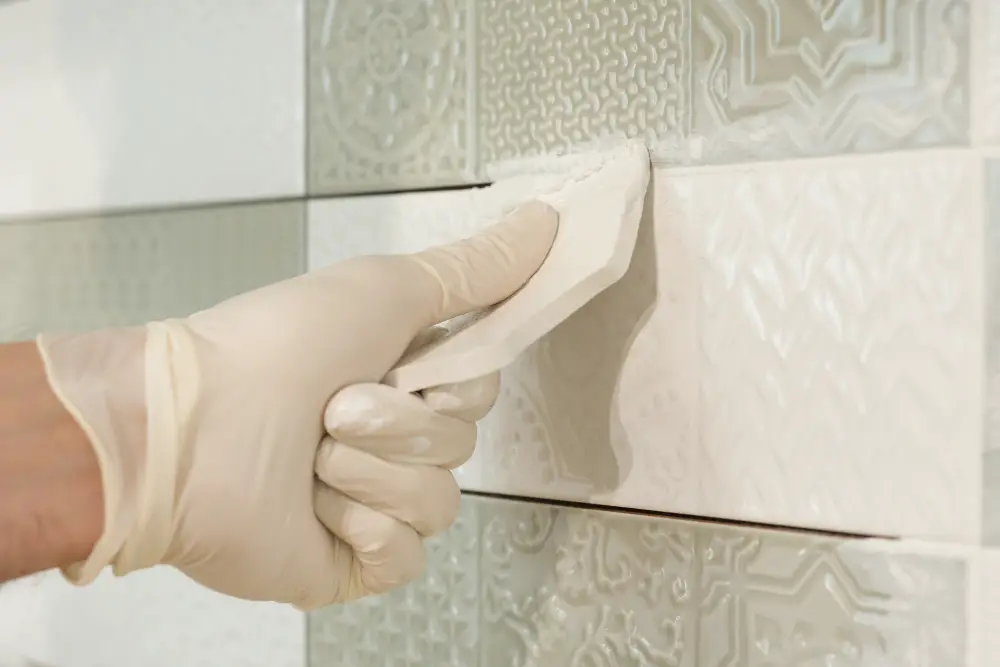
Grouting is an essential step in ensuring that your tiles are secure and water-resistant. To begin, mix your grout according to the manufacturer’s instructions until it reaches a smooth consistency.
Using a rubber float or squeegee, spread the grout over the tiles at a 45-degree angle, making sure that all of the joints are filled evenly. Work in small sections and remove any excess grout with a damp sponge before moving on to another area.
Allowing enough time for drying (usually 24 hours), use a dry cloth or towel to buff away any remaining haze from dried-up residue on top of each tile surface after applying and cleaning up excesses of wet cementitious material used as joint filler between individual tiles.
Cleaning and Sealing the Tiles
Cleaning the tiles will remove any excess grout or adhesive residue that may have been left behind during installation. Sealing the tiles will protect them from moisture and stains, ensuring they remain in pristine condition for years to come.
To clean your newly tiled area, use a damp sponge or cloth to wipe away any excess grout or adhesive residue. Be sure not to scrub too hard as this can damage the tile surface.
After cleaning, allow ample time for the tile surface to dry completely before sealing them with a high-quality sealer designed specifically for your type of tile material. Follow manufacturer instructions carefully when applying sealant and be sure not leave any gaps unsealed.
Installing Window Trim Over Tiles

Window trim is an essential finishing touch that will give your project a polished and professional look. Installing window trim over tiles can be tricky, but with the right tools and techniques, you can achieve a seamless finish.
Firstly, measure the length of each side of your window frame to determine how much trim you’ll need. Cut each piece of molding at a 45-degree angle using a miter saw or box cutter for precise cuts.
Next, apply construction adhesive along the backside of each piece of molding before pressing them firmly onto the wall above and around your tiled area.
Use finishing nails to secure each piece in place by nailing through both sides into studs behind drywall or plasterboard if possible. Fill any nail holes with wood filler before sanding smooth once dry.
Tile Maintenance and Care Tips
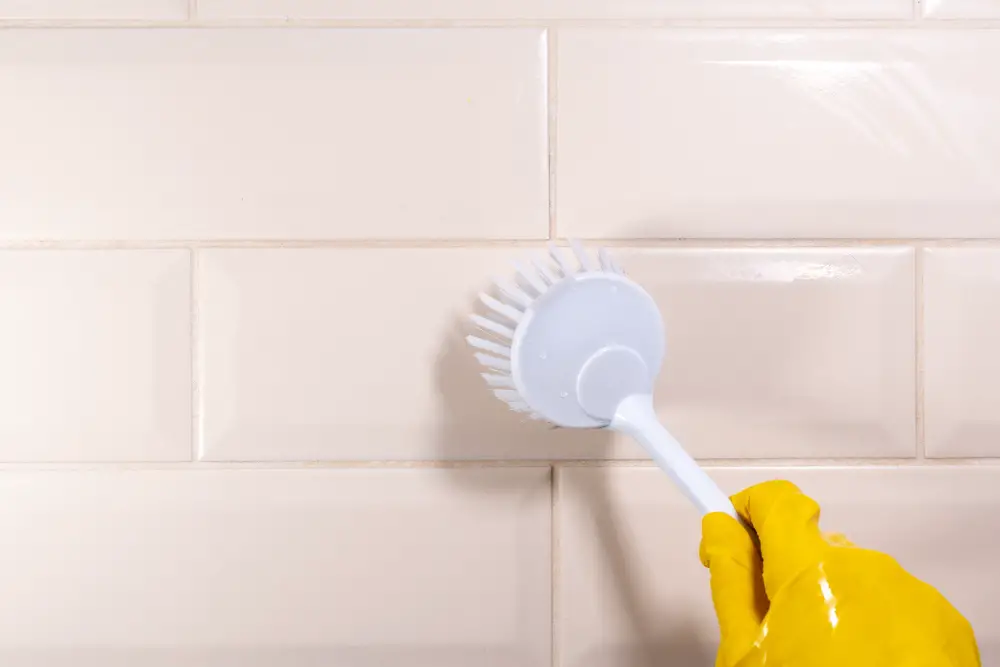
Regular cleaning will help keep them looking new and prevent any damage or discoloration over time. To clean your tiled window area, use a mild detergent mixed with warm water and a soft cloth or sponge.
Avoid using abrasive cleaners that can scratch the surface of the tiles.
In addition to regular cleaning, consider sealing the grout between tiles every six months to protect against moisture buildup and staining. This is especially important in areas like bathrooms where humidity levels are high.
If you notice any cracks or chips in your tile work, repair them as soon as possible before they worsen over time. You can purchase tile repair kits at most hardware stores that include everything you need for quick fixes.
By following these simple maintenance tips, you’ll be able to enjoy beautiful tiled windows for years to come!
FAQ
Where do you start when tiling around a window?
To tile around a window, start at the center of the bottom of the window, measure up, and mark the cutting points with a felt tip before cutting the tiles using appropriate tools.
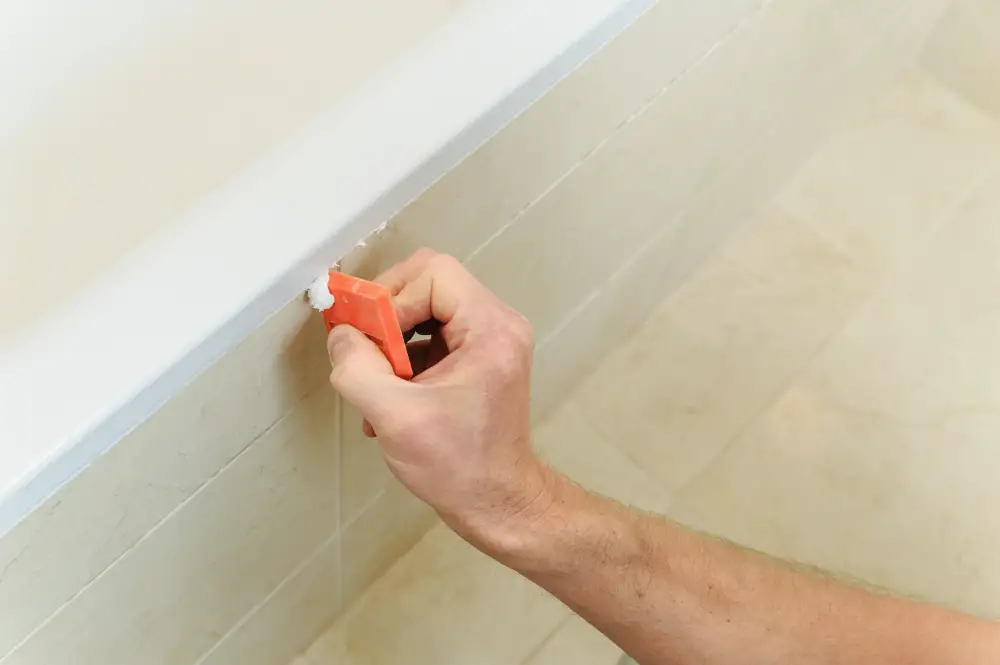
How do you fill a gap between tile and window?
To fill a gap between tile and window, apply a caulk that matches the grout color and smooth it using a caulking tool or a wet finger to prevent water damage.
How do you tile a window without trim?
To tile a window without trim, measure and cut tiles to size, apply adhesive to their backs, position them around the window, and then grout and seal the tiles.
What are the best practices for cutting and measuring tiles to fit around a window frame?
The best practices for cutting and measuring tiles around a window frame include marking tiles accurately, using a tile cutter, and ensuring a proper fit before installation.
How can you choose the right tile design and layout to complement the window area?
To choose the right tile design and layout to complement the window area, consider factors such as tile size, color, pattern, and texture to create a cohesive and visually appealing space.
Are there any specific tools or materials recommended for tiling around windows to ensure a smooth and professional finish?
Recommended tools and materials for a smooth and professional finish when tiling around windows include a tile cutter, tile clips, spacers, adhesive, notched trowel, and a straight edge.
Read More
 Aluminum Window Latch Replacement: A Simple Guide to Security and Style
 Custom Aluminum Window Screens Buying Guide
 Aluminum Window Removal Tool: Easy Steps for a Hassle-Free Window Replacement
 Screw for Aluminum Window Frame: Your Ultimate Fixing Guide
 Replace Aluminum Window Glass: A Beginner’s Guide to a Clearer View
Recap