Discover the simple step-by-step process to efficiently install a window well in your home, enhancing both safety and aesthetics.

Windows are an essential part of any home, providing natural light and ventilation. However, when it comes to basement windows, they require a little extra attention.
Not only do they need to be installed correctly for safety reasons, but they also need proper drainage to prevent water damage. That’s where window wells come in! In this blog post, we’ll be discussing how to install a window well properly and efficiently.
Whether you’re a DIY enthusiast or just looking for some guidance on the process, we’ve got you covered with all the information you need! So let’s dive right in!
Key takeaways:
- Assess the location and clearance of your basement window.
- Choose the right type of window well for your needs.
- Measure the height, width, and projection of your basement window.
- Select a window well that fits your dimensions.
- Gather necessary tools and prepare the installation area.
Assessing Window Location
Before installing a window well, it’s essential to assess the location of your basement window. The first thing you need to do is ensure that there is enough space around the window for a well.
If there isn’t enough room, you may need to consider moving the window or choosing an alternative solution.
Another critical factor in assessing your basement windows’ location is determining if they are below ground level and how much clearance they have above them. This information will help determine what type of well you’ll need and how deep it should be.
It’s also important to check for any obstructions such as pipes or electrical wires that could interfere with installation before proceeding further with this project.
Choosing Window Well Type
There are several types available in the market, and each has its own advantages and disadvantages. The most common types include plastic, metal, concrete or stone.
Plastic wells are lightweight and easy to install but may not be as durable as other materials. Metal wells come in different shapes and sizes with varying degrees of durability depending on their thickness.
Concrete or stone wells offer excellent durability but can be challenging to install due to their weight.
When choosing a window well type for your home, consider factors such as cost-effectiveness, ease of installation/maintenance/repair/replacement/durability/weather resistance/aesthetics/safety features (such as locking covers), etc., before making a final decision.
Sizing the Window Well
Before purchasing a window well, you need to measure the height, width, and projection of your basement window. The height should be measured from the bottom of the windowsill to where you want the top edge of your well to sit.
The width should be measured from one side jamb (the vertical frame on either side) across to its opposite counterpart.
Once you have these measurements in hand, it’s time for some math! You’ll need at least 6 inches between each measurement and any obstructions like pipes or vents that may interfere with installation.
When choosing a size for your new window wells keep in mind that they must extend at least 4-6 inches beyond both sides and below ground level so water can drain away properly without pooling around or seeping into cracks around foundation walls.
Measure the Basement Window
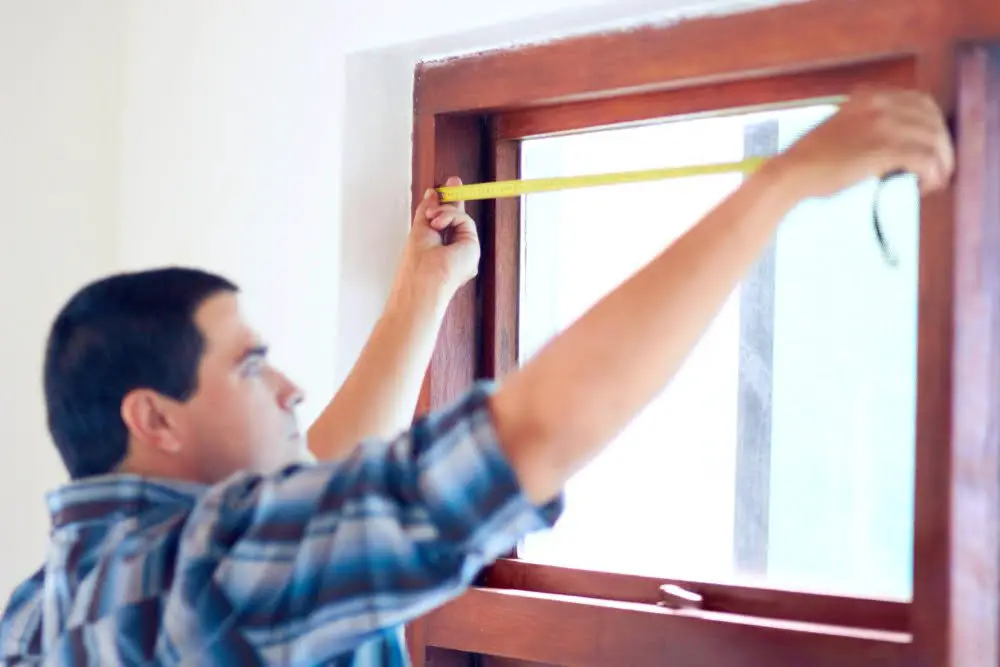
This step is crucial because it ensures that you choose the right size of the well for your needs. To get started, take accurate measurements of both height and width using a tape measure or ruler.
When measuring for your new window well, be sure to account for any obstructions such as pipes or vents that may interfere with installation. You’ll also want to consider how far out from the wall you want your new window well to extend.
Once you have all these measurements in hand, use them when selecting a pre-fabricated unit or designing one yourself if necessary.
Choose a Window Well That Fits Those Dimensions
Window wells come in different sizes and shapes, so it’s essential to select one that matches your needs. You can find them made from various materials such as metal, plastic or concrete.
When choosing a window well for installation, consider the following factors:.
- The size of the basement windows
- The depth required for proper drainage
- The material used in construction
It is crucial to ensure that you purchase a high-quality product with adequate strength and durability. A poorly constructed or weakly supported window well could collapse under pressure during heavy rainfalls or snowstorms.
Take note of any local building codes regarding minimum requirements for egress windows and their corresponding wells before making any purchases. This will help ensure compliance with safety regulations while also providing peace of mind knowing your home is secure.
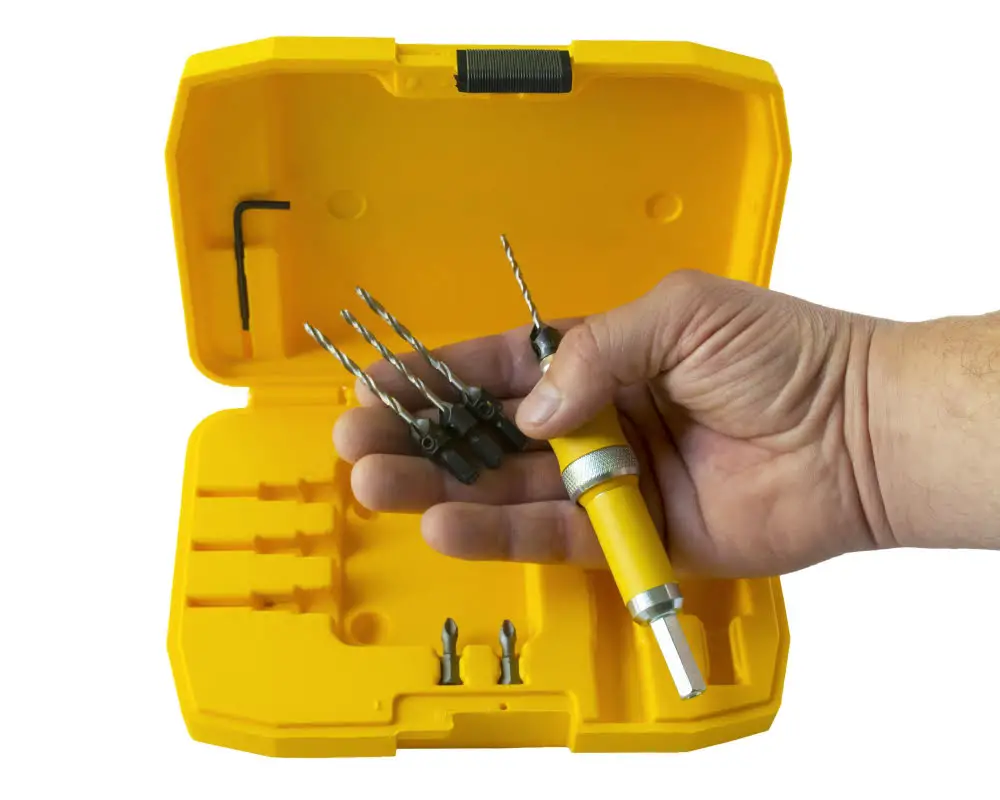
Gathering Necessary Tools

Having everything on hand will make the process smoother and more efficient. Here are some of the tools you’ll need:
- Shovel
- Auger
- Tape measure
- Level
- Hammer drill
- Circular saw or reciprocating saw (depending on your choice of material)
- Safety glasses and gloves
Make sure that all your equipment is in good working condition before starting work. If any tool needs repair or replacement, do so beforehand to avoid delays during installation.
Preparing the Installation Area
This step is crucial as it ensures that your window well will be installed correctly and safely. First, clear any debris or obstacles from around the basement window where you plan to install a new well.
Then mark out an area around this space with spray paint or chalk.
Next, remove any grass or vegetation within this marked-out area using a shovel or other garden tools. You’ll want to dig down about six inches below ground level in preparation for installing gravel later on.
Once you’ve cleared away all of these obstructions and dug down enough soil, make sure that there are no underground utilities such as gas lines running through this spot before proceeding further with excavation work! If necessary contact local utility companies beforehand so they can come out and mark off areas where their services may be present.
Digging the Window Well Hole
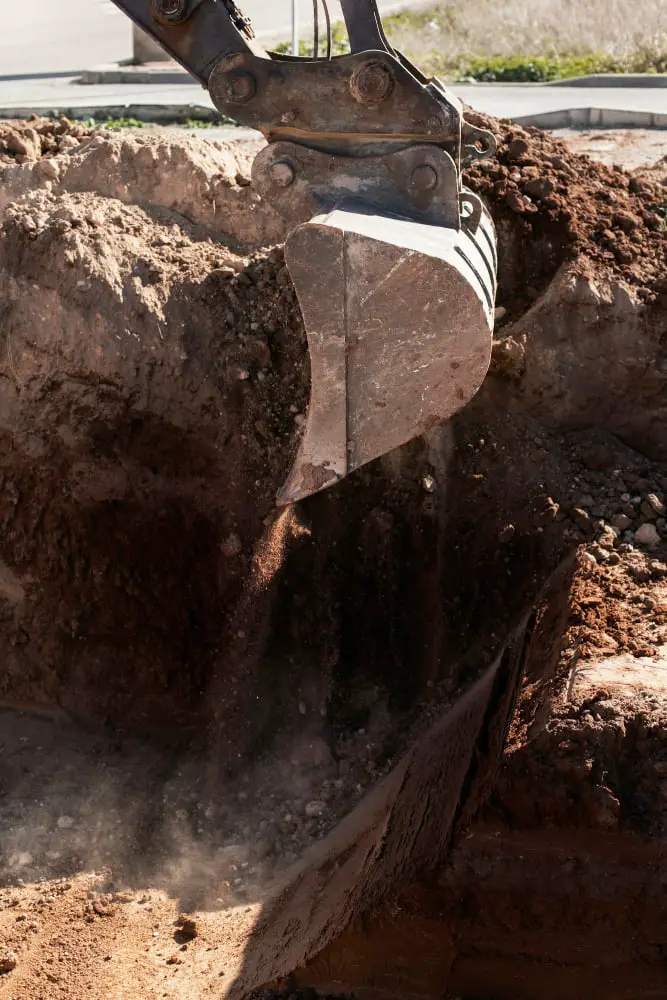
Before you begin, make sure to gather all necessary tools such as a shovel, pickaxe or mattock, wheelbarrow and safety gear like gloves and goggles.
Start by marking out where you want your window well hole to be dug. Use spray paint or chalk for this purpose.
Then use an auger drill bit attached to a power drill or hand-held auger tool (depending on how deep the hole needs to be) for initial excavation.
As you dig deeper into the ground with each pass of your tool, remove any rocks or debris from inside the hole using a shovel. Be careful not to damage any pipes that may run beneath where you’re digging.
The depth required will depend on local building codes but typically ranges between 36-48 inches deep from topsoil level down into undisturbed soil layers below grade level around foundation walls.
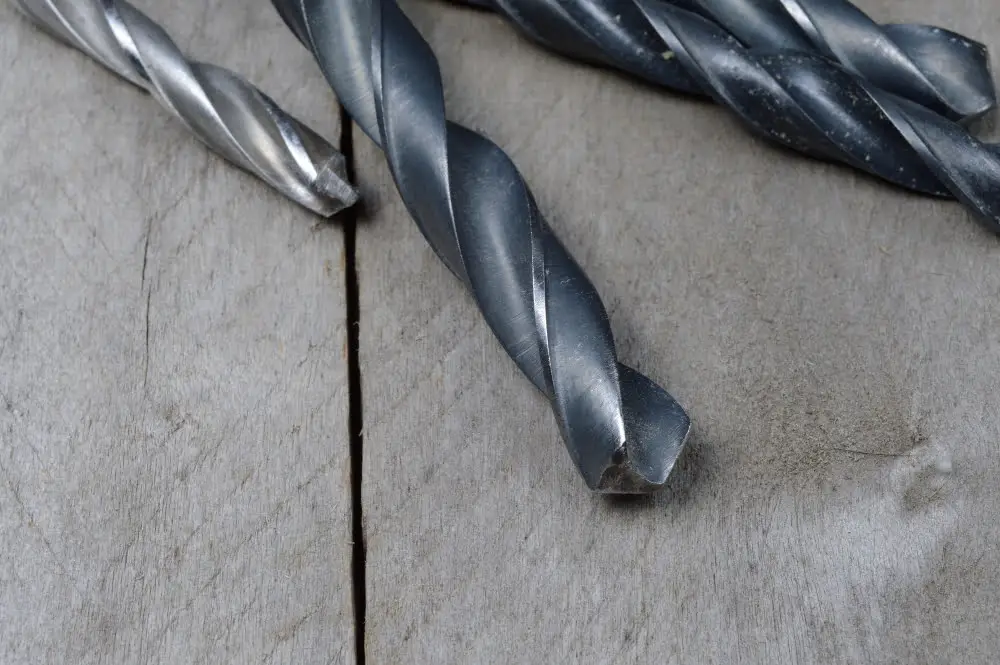
Start With an Auger
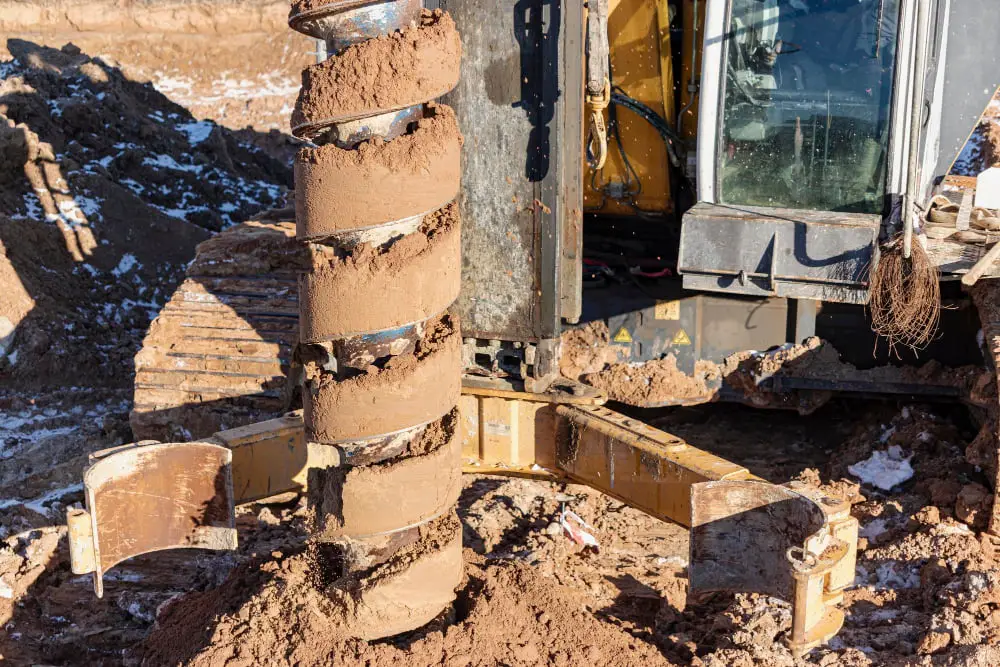
The first step in this process is to use an auger. An auger is a tool that can be used for drilling holes into soil or other materials.
It’s important to note that not all window wells require an auger, but if you’re dealing with hard-packed soil or clay, using one will make your job much easier.
To begin using an auger, attach it securely to a power drill and position yourself at the designated spot where you want your well hole dug. Start drilling slowly while applying downward pressure on the drill until it reaches about 6 inches deep into the ground.
Then remove any dirt from around its edges before continuing further down until reaching approximately 3 feet deep (or as required by local building codes). Keep in mind that some areas may require deeper wells due to frost lines or other factors.
Using an Augur ensures precision when digging out space for installing a window well; however, if there are any rocks present during excavation process they should be removed manually as they could damage both tools and equipment being used during installation.
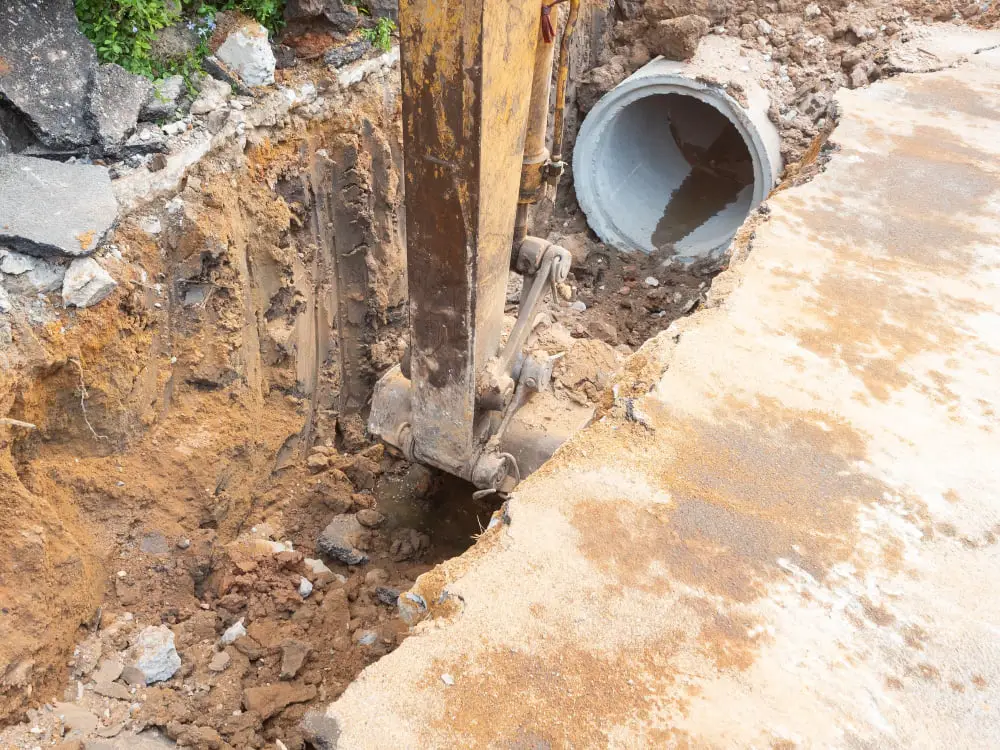
Installing a Drainage System
This is an essential step in preventing water damage and ensuring proper drainage of rainwater or snowmelt. To start, you’ll need to create a slope from the bottom of the window well towards where you want the water to drain away from your home.
Next, dig a trench leading away from this point and line it with landscape fabric before adding gravel on top. The purpose of this layer is to prevent soil particles from clogging up your drain over time.
After that, add perforated pipe into the trench with one end pointing towards where you want water drained off while leaving enough space between each section for easy installation later on down-the-line if needed.
Make the Drain
This is an essential step in preventing water damage and ensuring that your basement stays dry. To make the drain, start by digging a trench from the bottom of the window well to a location where water can safely drain away from your home.
Next, lay down some landscape fabric along with some gravel at the bottom of this trench. The fabric will help prevent dirt and debris from clogging up your drainage system while allowing water to flow freely through it.
After laying down these materials, place perforated pipe on top of them inside this trench. Make sure that one end is positioned at least 2 inches below where you want standing water levelled off in order for proper draining.
Install the Drain
This is an essential step in preventing water damage and ensuring proper drainage of rainwater or snowmelt. To start, dig a trench from the bottom of the window well to where you want to drain excess water away from your home.
Next, lay down some landscape fabric at the bottom of this trench before adding gravel on top. The fabric will help prevent soil and debris from clogging up your drain over time.
Now it’s time to add piping that will carry any excess water away from your home’s foundation. Use PVC pipe with holes drilled into it so that water can seep through easily but still be carried away by gravity.
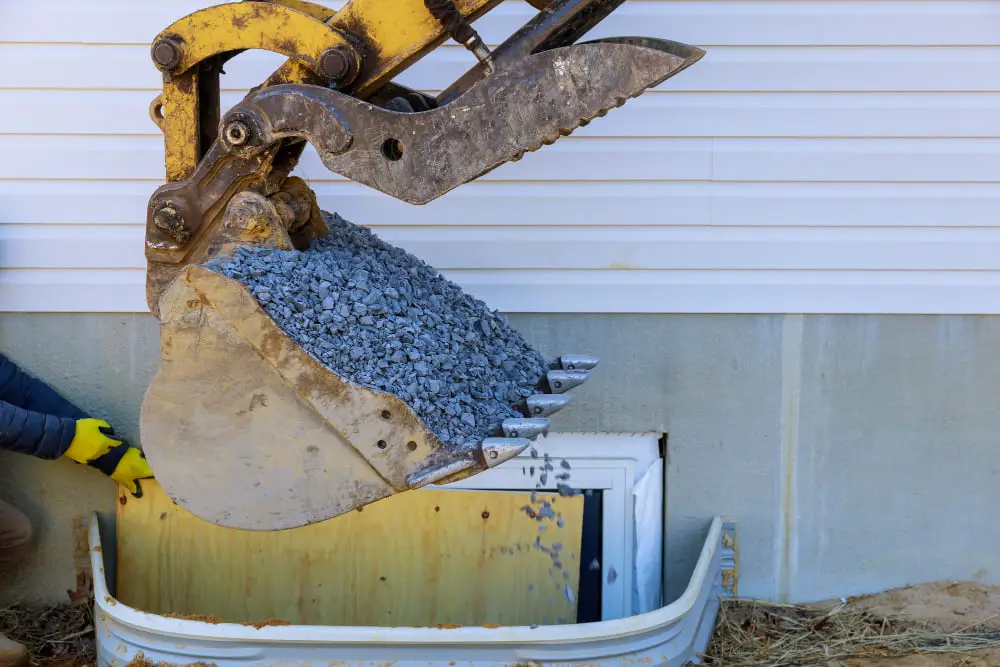
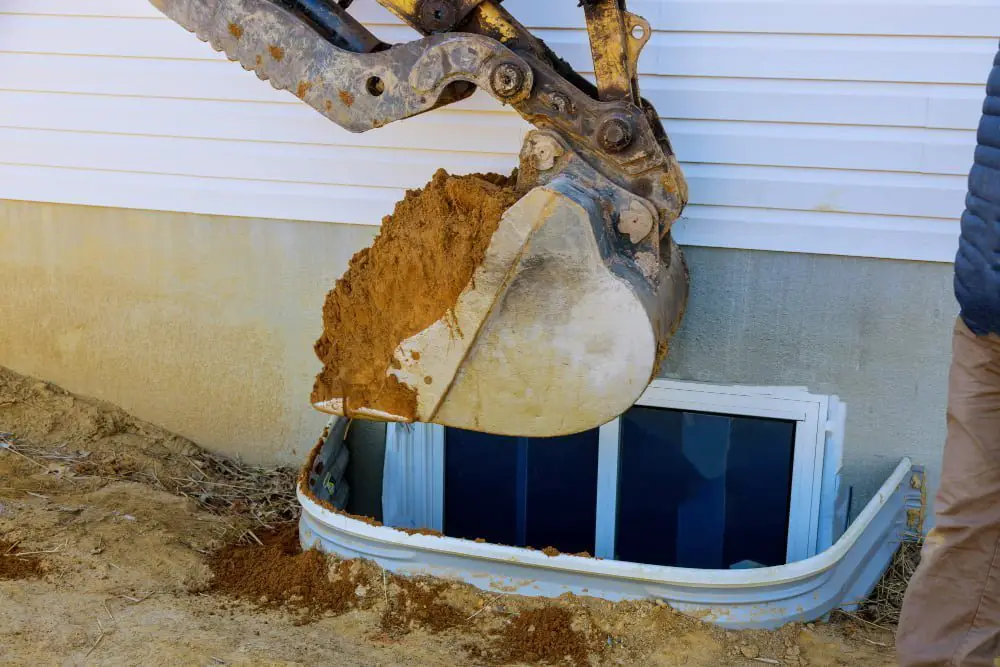
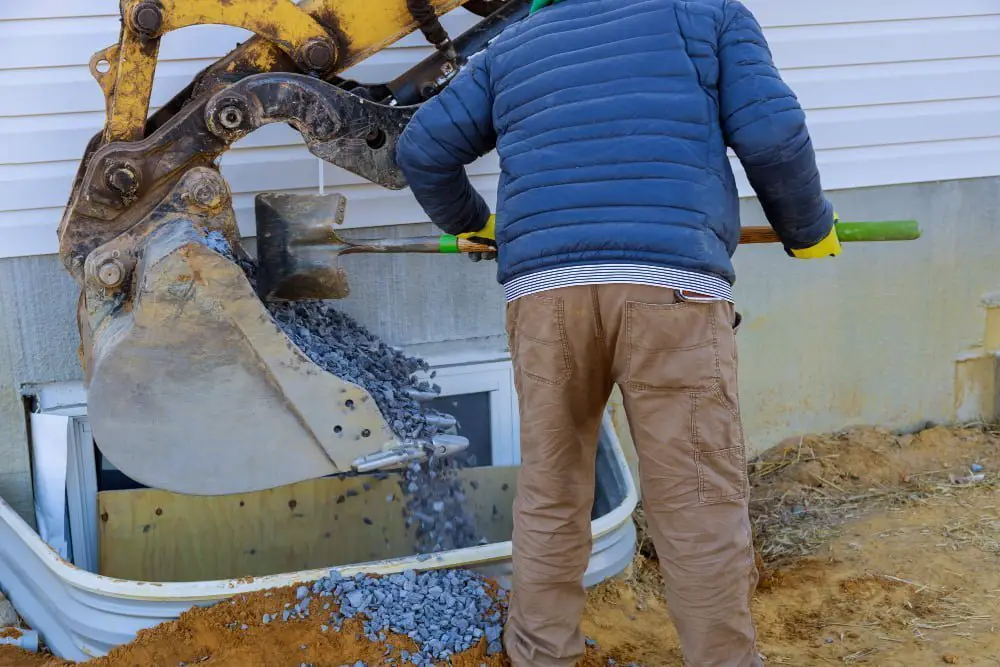
Add Gravel
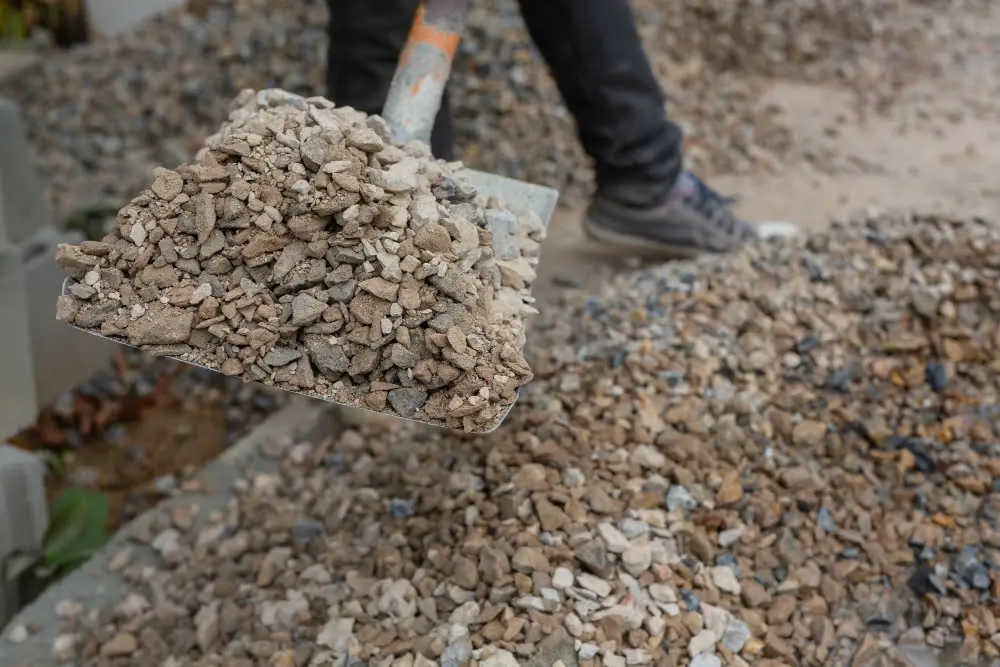
The purpose of adding gravel is to provide a stable base for the window well and allow water to drain away from your home’s foundation. Start by pouring a layer of 2-3 inches of pea gravel into the bottom of the hole.
Spread it evenly across the entire area.
Next, place your window well on top of this layer and ensure that it sits level with your basement window frame. Then pour another 2-3 inch layer around its perimeter.
Afterward, use a tamper or shovel handle to compact each layer firmly before adding more material until you reach ground level.
Adding too much soil at once can cause settling over time which may lead to damage or collapse in extreme cases; therefore, make sure not only that each section is compacted but also leveled before moving onto another one.
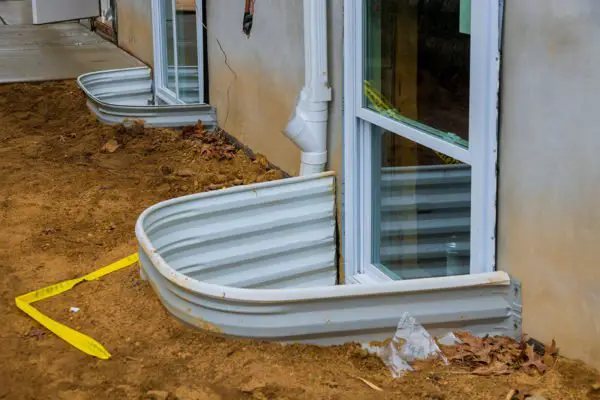
Securing the Window Well
This is an essential step that ensures your window well stays put and doesn’t shift or move over time. To do this, you’ll need to drill pilot holes into the foundation wall where the flanges of your window well will be attached.
Using a masonry bit, drill 3/16-inch diameter holes at each pre-marked location on both sides of the window opening. Then insert plastic anchors into each hole until they are flush with the surface of your foundation wall.
Next, position your new window well against its corresponding opening and align its mounting flange with those drilled pilot holes in both sides of the opening. Once aligned correctly, use screws to attach them securely through their respective mounting flanges and into those previously drilled anchor points.
Drill Pilot Holes
This step is crucial as it ensures that the screws go in straight and don’t damage the well or your home’s foundation. To do this, use a power drill with a small bit to make starter holes where you marked earlier on the wall of your house.
Make sure that these pilot holes are slightly smaller than your screws so they can grip tightly when inserted. Once all of them are drilled, insert each screw into its respective hole and tighten them down until they’re snug but not too tight.
Secure the Well With Screws

This step is crucial as it ensures that your window well stays in place even during heavy rainfall or other weather conditions. To do this, you will need to drill pilot holes into both sides of your window well using a power drill.
Next, position your window well over the hole and align it with your basement wall so that there is an equal amount of space on all sides. Once aligned correctly, insert screws through each pilot hole and into the wall behind them.
Make sure to use screws specifically designed for masonry walls as they are strong enough to hold up against harsh weather conditions. It’s also important not to overtighten these screws as doing so can cause damage or cracking in both your basement wall and new installation.
Backfilling and Compacting Soil
This step is crucial as it ensures that your window well remains stable and secure for years to come. Start by filling in any gaps between the edge of the hole and your new window well with dirt or gravel.
Then, use a tamper or compactor tool to pack down the soil around your new installation.
It’s important not to rush this process; take your time when packing down each layer of soil until you reach ground level. Once you’ve reached ground level, add more dirt on top of everything else until there are no visible gaps left.
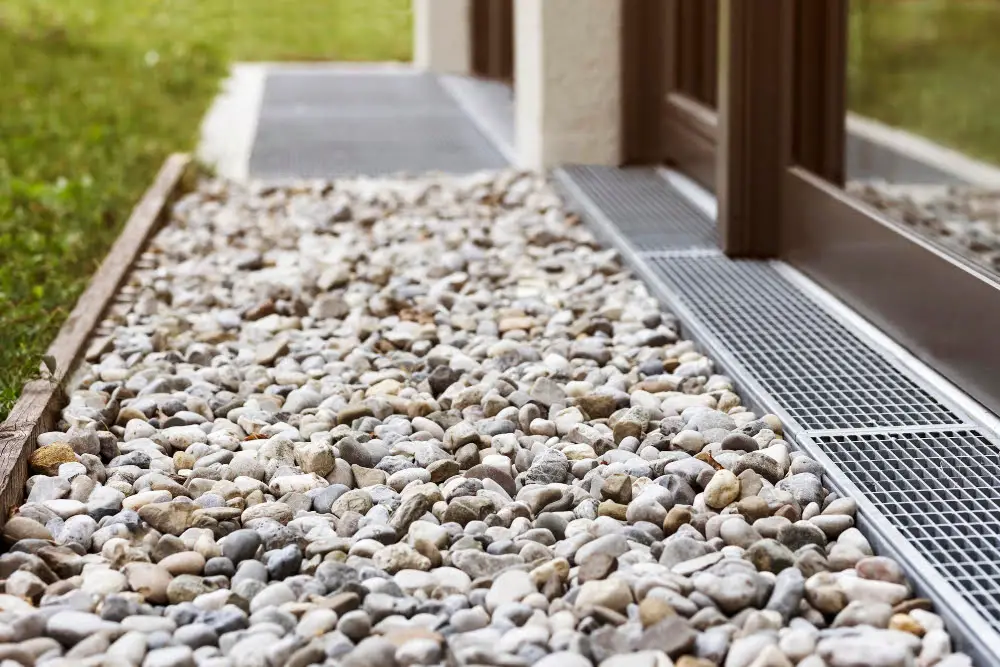
Fill the Well With Gravel
This step is crucial as it helps prevent water from pooling in the well and causing damage to your basement window. Start by adding a layer of gravel at least 4 inches deep at the bottom of the hole.
Then, place your window well on top of this layer and add more gravel around its edges until it’s level with or slightly above ground level.
Make sure you use clean crushed stone or pea-sized gravel for this process as they allow for proper drainage while preventing soil from clogging up in between rocks over time.
Filling your window wells with stones also adds an extra layer of protection against debris that could potentially block up any drains leading into them during heavy rainfall periods.
Use Dirt to Fill in Remaining Spaces in the Hole
This will help secure the window well and prevent any shifting or movement over time. Start by adding a layer of soil around the edges of your window well, making sure that it is level with your yard’s surface.
Use a tamper or shovel to compact each layer as you go along, ensuring that there are no air pockets left behind. Continue adding layers until you reach ground level.
It’s important not to rush this step since proper compaction is crucial for preventing water from seeping into your basement through gaps between soil and window wells.
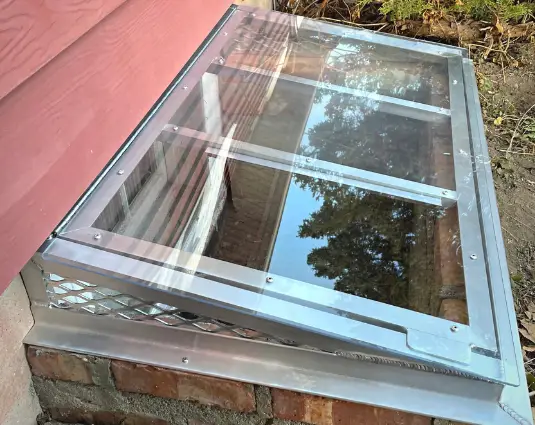
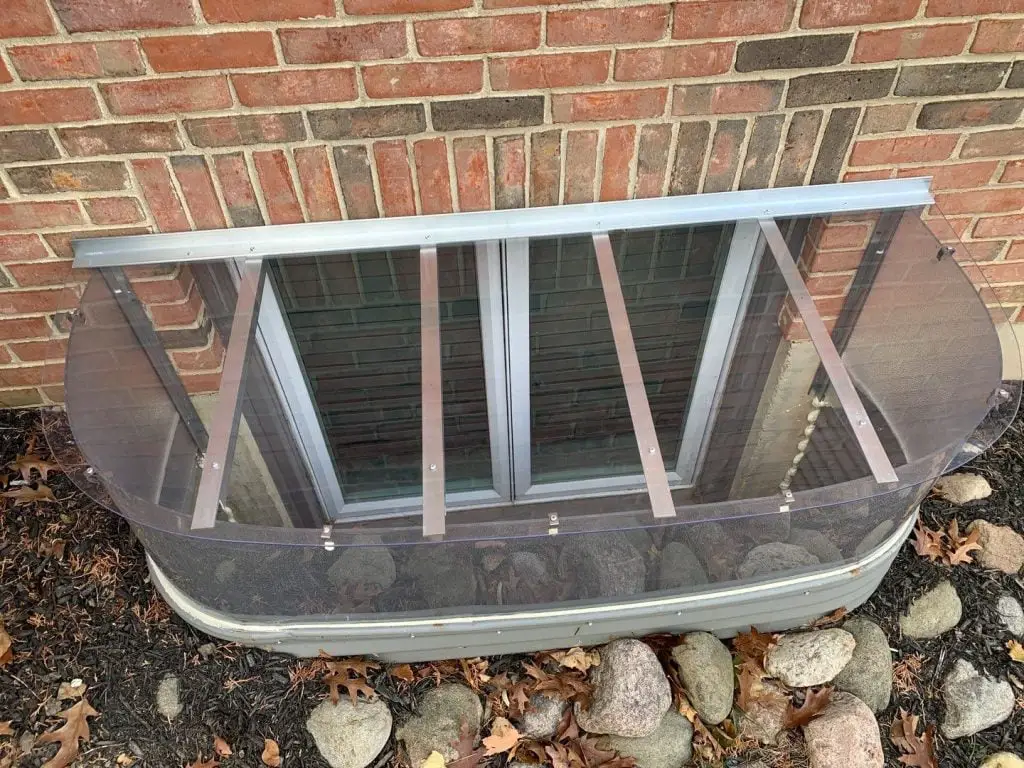
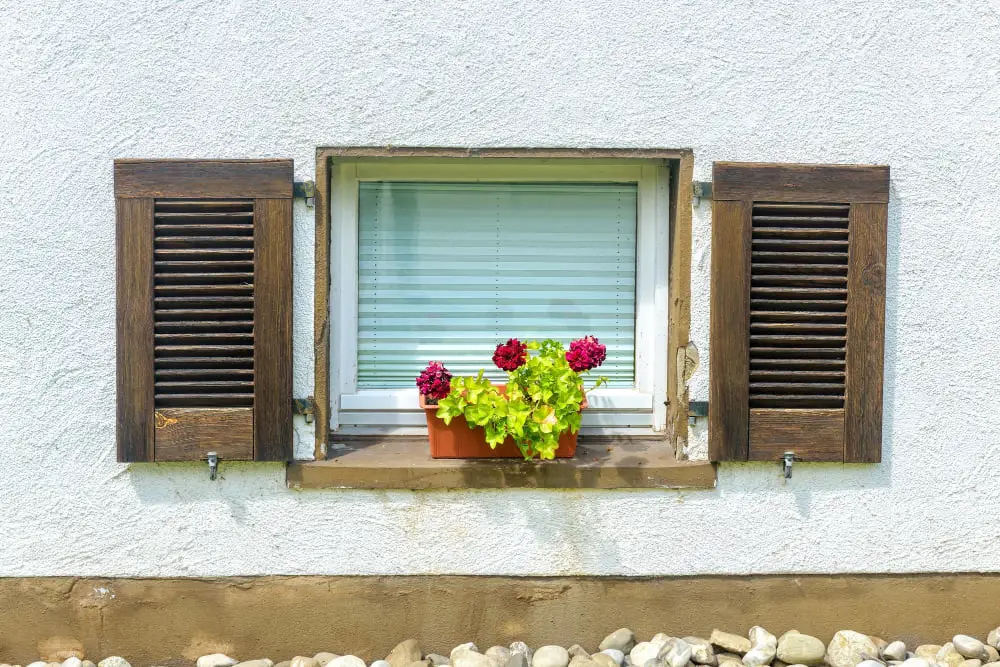
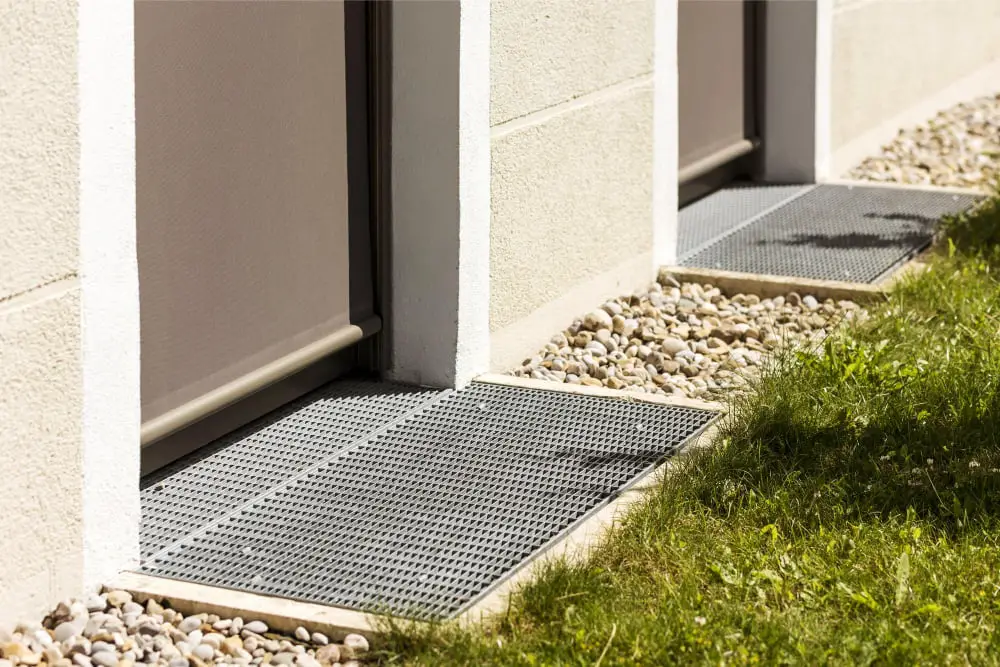
Attaching Well Cover
A well cover will protect your basement windows from debris and water damage while also preventing accidents. There are various types of covers available in the market, including plastic, metal grates or polycarbonate materials.
To install a window well cover:.
- Measure the dimensions of your window well.
- Purchase a pre-made or custom-fit cover that matches those dimensions.
- Place the cover over the top of your window well and ensure it fits snugly.
- Secure it with screws or clips around its perimeter.
It’s important to note that some covers may require additional support brackets for added stability and safety purposes.
By following these simple steps on how to install a proper drainage system along with attaching an appropriate covering for your newly installed basement windows’ wells, you can rest assured knowing they’re safe from any potential hazards while still allowing natural light into space!.
FAQ
Can you install window wells yourself?
Yes, you can install window wells yourself by digging holes for the well and drain, and then mounting the window well securely onto your home.
Do window wells need to be attached to foundation?
Yes, window wells need to be attached to the foundation of a home for safety reasons and to withstand harsh elements.
How deep should you dig a window well?
A window well should be dug 8 inches deeper than the windowsill and 6 inches wider than the window.
What type of drainage system is recommended for effective window well installation?
A perimeter drain system is recommended for effective window well installation.
Which building codes or regulations should you consider before installing a window well?
Before installing a window well, consider local building codes, egress requirements, and safety regulations.
What materials are commonly used for constructing window wells, and how do they affect longevity and maintenance?
Common materials used for constructing window wells include galvanized steel, corrugated metal, and plastic, which vary in longevity and maintenance requirements.
Read More
 Aluminum Window Latch Replacement: A Simple Guide to Security and Style
 Custom Aluminum Window Screens Buying Guide
 Aluminum Window Removal Tool: Easy Steps for a Hassle-Free Window Replacement
 Screw for Aluminum Window Frame: Your Ultimate Fixing Guide
 Replace Aluminum Window Glass: A Beginner’s Guide to a Clearer View
Recap