Knowing how to hang a valance can transform your windows because it adds an extra layer of elegance while providing additional light control.
Key takeaways:
- A valance’s width should be 1.5 to 2 times the window width.
- Place the valance above the window frame for a higher ceiling appearance.
- Ensure the depth of the valance clears underlying window treatments.
- Choose a valance style that complements your room’s decor.
- Layer a valance over curtains or blinds for added texture.
Things You Should Know

Valances, often used to conceal curtain hardware or to add a decorative touch to windows, come in various styles and sizes.
Before hanging a valance, consider the following:
- A valance’s width usually extends beyond the window frame for a full, gathered look. It’s typically 1.5 to 2 times the window width.
- Height placement is crucial. A valance can make the ceiling appear higher when placed above the window frame.
- Depth of the valance should clear any underlying window treatments, allowing for easy operation without obstruction.
- Valance style should complement your room’s decor and existing window treatments.
- Layering a valance over curtains or blinds can provide an additional texture or color contrast.
- The hardware for hanging your valance must be appropriate for the valance type and the wall material.
Keep these in mind as we move through the steps of measuring, choosing the necessities, and getting your valance perfectly positioned for your space.
Measuring for the Valance
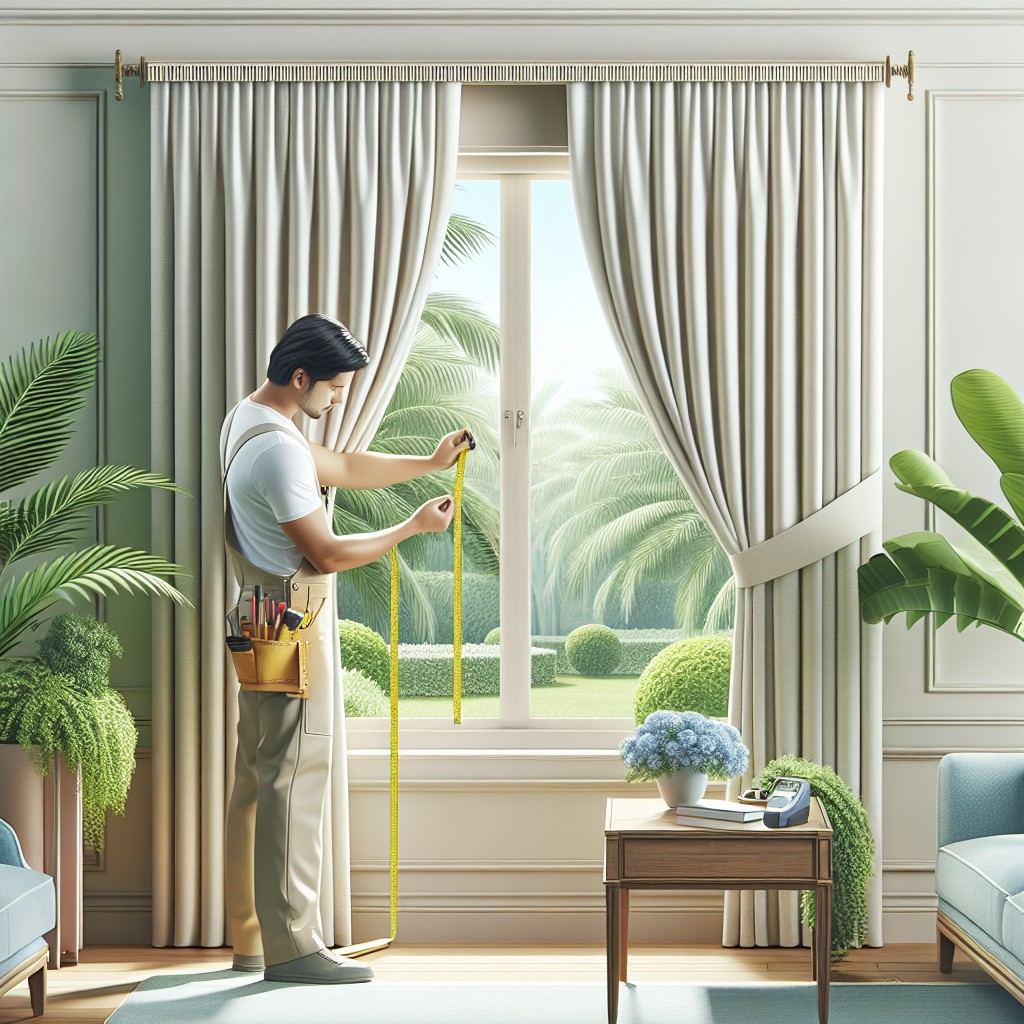
Ensure accuracy with the following steps:
1. Measure Window Width: Use a tape measure to determine the width of your window. Include the window frame in this measurement, as the valance should extend slightly beyond it for proper coverage.
2. Determine Rod Length: Add 2 to 4 inches on each side of the window frame. This extra width allows space for the valance to hang without blocking the window when mounted.
3. Assess Placement Height: Decide where above the window the valance will hang. Traditionally, valances are placed around 4 inches above the window frame, but you can adjust this for a higher or lower placement depending on ceiling height and personal preference.
4. Measure for Rod Height: From your desired placement point, measure to where the bottom of the valance will fall, ensuring it adequately covers the window’s top and any hardware.
Remember these measurements when selecting your valance and hardware for a well-proportioned window treatment.
Things You’ll Need
Before embarking on installing a valance, it’s imperative to gather all necessary tools and materials. Ensure you have:
- Measuring tape – for taking precise window measurements.
- Pencil – to mark spots for bracket placement.
- Drill – used for creating holes where the brackets will be secured.
- Screwdriver – for attaching brackets to the wall or window frame.
- Wall anchors – these provide extra support for the brackets in drywall.
- Screws – typically included with the brackets, used to fix the brackets in place.
- Level – guarantees your valance hangs evenly.
- Valance – should be appropriately sized for your window.
- Brackets – for supporting the rod or board from which the valance will hang.
- Valance rod/board – depending on the style of valance, this will be the structure to which the fabric is attached.
Remember, the type of rod and brackets may vary depending on the valance style you choose, so always refer to the valance’s product guidelines for specific hardware recommendations.
Installing the Valance Brackets
Position the brackets above the window frame according to your earlier measurements, with attention to the valance width. Confirm the bracket locations using a level to ensure they are even and straight. Mark the bracket placement spots with a pencil.
Drill pilot holes at the marked spots to prevent the wood from splitting. These should be slightly smaller than the screw size. Secure the brackets into place using the provided screws, fixing them firmly into the wall or window frame. Double-check the bracket alignment by placing the level on top of the installed brackets.
If the valance is particularly heavy or the wall material requires it, use wall anchors for added support. Ensure anchors are suitable for the wall type, whether it be drywall, plaster, or masonry. Follow the anchor installation instructions, then attach the brackets to the anchored spots.
Once the brackets are installed, proceed to the next step of hanging your valance.
Putting Up the Valance
Slide the valance onto the rod if you’re using a rod pocket, tab top, or similar style that requires threading. Adjust it to distribute the fabric evenly for a polished look.
Securely fasten the ends with clip rings or drapery pins if you’re hanging a flat or M-shaped valance.
Attach the rod to the pre-installed brackets, making sure it clicks into place or sits sturdily within the bracket hooks.
Step back to check that the valance hangs straight and makes a pleasing curve or tailored line atop your window.
Make any final adjustments as needed to ensure that the valance is sitting just right, creating a harmonious frame for the window.
Tips
Consider the window’s width when selecting a valance; wider windows may require an extended or additional valance for full coverage.
Use a level to ensure the brackets are straight before securing them; this will prevent a lopsided appearance.
For a fuller look, gather or pleat the valance fabric more densely.
For a changeable decor, opt for valances with interchangeable panels.
Always check the valance’s fabric care instructions to maintain its appearance and longevity.
If using a patterned fabric, align the pattern when joining multiple valances for a seamless look.
When layering valances with curtains, hang the valance at least 1.5 to 2 inches above the curtain rod for a cohesive design.
Expert Q&A
In the Expert Q&A section, you’ll find responses to common questions that may arise during the valance hanging process. These respond to specific concerns and provide additional insights from industry professionals.
Can I use regular curtain rods for valances? Yes, standard curtain rods work well with most valance types.
How far above the window should I hang my valance? Typically, valances are hung 4 to 6 inches above the window frame to create an illusion of height.
What if my valance is too wide for the window? Center the valance and ensure equal amounts of excess on both sides for a balanced look.
Can valances be hung on tension rods? Tension rods are suitable for lightweight valances and can be used without drilling holes into the wall.
How do I ensure the valance hangs straight? Use a level when installing brackets and make adjustments as necessary for a straight appearance.
Use this practical advice to navigate the nuances of valance installation, contributing to a flawless window treatment.
Rod Pocket Valances
Rod pocket valances feature a sewn-in pocket that slides easily onto a curtain rod, presenting a gathered or ruffled aesthetic. To hang this type of valance, follow these points:
- 1. Measure the width of the window and add two to four inches on each side for appropriate fullness.
- 2. Select a curtain rod that matches the width requirement; the rod diameter must fit the pocket size.
- 3. Evenly distribute the valance on the rod to ensure the fabric gathers uniformly.
- 4. Securely mount the rod on the previously installed brackets, ensuring it’s level.
- 5. Make any final adjustments to the gathers for a polished look.
This method preserves the fabric’s design while adding a traditional touch to the window treatment.
Tab Top Valances
Tab top valances are characterized by fabric loops that slide easily onto a rod, creating an informal and relaxed look.
For a successful installation:
- Measure the width of your window to ensure your valance is wide enough to cover it, ideally extending beyond the window frame by two to three inches on each side.
- Choose a decorative rod that complements your valance’s fabric and color, keeping in mind the diameter of the rod must fit the tabs comfortably.
- Evenly space out the tabs when sliding the valance onto the rod for a uniform drape.
- Secure the ends with finials, if the rod design includes them, to prevent the valance from sliding off.
- Adjust the fabric between tabs to create a consistent appearance across the window.
Remember, the gap between the top of the window and the valance will affect the overall look – a smaller gap creates a sense of height in the room.
Flat Valances
Flat valances offer a sleek, modern look that complements a variety of decor styles. They are essentially a straight piece of fabric that extends across the top of a window, providing a clean-lined finishing touch to your window treatment.
Here’s how to ensure a perfect fit and installation:
- Measure the width of your window and decide on the desired overlap. Typically, a flat valance should extend at least 2 inches on either side of the window frame.
- Consider the length. A common drop for flat valances is 15 to 18 inches, but this can vary based on the window size and personal preference.
- Choose a sturdy curtain rod or valance rod that can support the weight of your fabric choice.
- Pre-drill holes for the brackets to keep the installation process smooth. Use a level to ensure that the brackets are even.
- Secure the valance onto the rod. If using a rod pocket design, slide the rod through. For fabric with no pocket, use clip rings or drapery hooks.
- Place the rod onto the installed brackets. Adjust the valance so it’s distributed evenly across the window.
- For added stability, especially with wider windows, install a center support bracket.
By following these steps, a flat valance will provide a simple yet elegant frame to any window. Remember to iron or steam the valance prior to installation to remove any wrinkles, ensuring a neat appearance.
M-Shaped Valances
M-shaped valances, admired for their elegant dips and curves, add a formal touch to any window. To hang them beautifully:
- Ensure Proper Fit: The width of the valance should be 2 to 3 times the window width for fullness, and its point should line up with the centre of the window.
- Consider the Hardware: Use a sturdy curtain rod that can support the weight and shape of the valance without sagging.
- Create Symmetry: Evenly space the peaks and valleys of the M-shape to achieve a balanced look. This might require adjusting the gathered fabric along the rod.
- Steam or Iron: An M-shaped valance looks best without wrinkles. Iron or steam the fabric before hanging to define the crisply tailored edges.
- Secure Placement: Anchor the curves in place with tiebacks or small weights to maintain the M shape over time.
Straight Valances
Straight valances offer a clean, minimalist look that works well in both modern and traditional decors. Here are key points to keep in mind:
1. Length and Fullness: Measure how wide you want the valance to be. Typically, they should be 1.5 to 2 times the width of your window for a full look without appearing too bunched.
2. Fabric Choice: Select a fabric that complements your room. Heavier fabrics like velvet add a sense of luxury and require more support, while lighter materials like cotton present a more casual appearance.
3. Hemming: Ensure the bottom of the valance is hemmed straight to keep the design sharp. Hemming also prevents the fabric from fraying and extends the life of your valance.
4. Installation: Balance the valance on the rod so that it hangs evenly across. If the fabric is unlined, be mindful that sunlight can cause patterns and colors to fade over time.
5. Styling: Pair with side panels for additional framing or let the straight valance stand on its own for a simple window accent. Consider the room’s lighting when positioning the valance, as it will not provide much light control on its own.
FAQ
What is the proper way to hang a valance?
The proper way to hang a valance is to ensure it covers the top 2-6 inches of the window frame with the remainder of the fabric covering the wall above, and hang it 1-2 inches from the top of the ceiling if there isn’t a large gap between the top of the window and the ceiling.
How high above a window should a valance be hung?
A valance should typically be hung 2 to 6 inches above the window, covering part of the window frame, or, if space is limited, right under the ceiling.
What are the best materials for a durable and stylish valance?
The best materials for a durable and stylish valance are heavyweight fabrics like cotton, silk, velvet, or linen.
Can you hang a valance without a curtain?
Yes, a valance can be hung independently without a curtain.
What are the different types of valances available and what styles do they suit best?
Valances available include box pleat valances for modern homes, tailored valances for traditional styles, balloon valances for a romantic feel, swag valances for dramatic effect, and ascot valances for Victorian style homes.
Read More
 Aluminum Window Latch Replacement: A Simple Guide to Security and Style
 Custom Aluminum Window Screens Buying Guide
 Aluminum Window Removal Tool: Easy Steps for a Hassle-Free Window Replacement
 Screw for Aluminum Window Frame: Your Ultimate Fixing Guide
 Replace Aluminum Window Glass: A Beginner’s Guide to a Clearer View
Recap